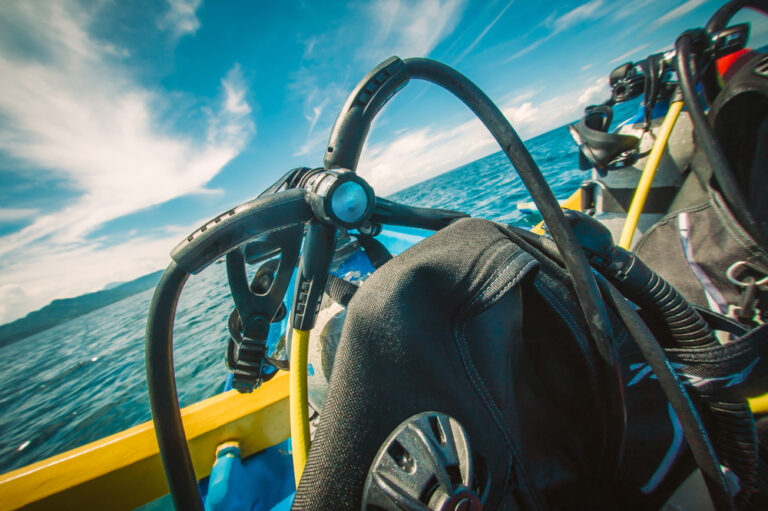
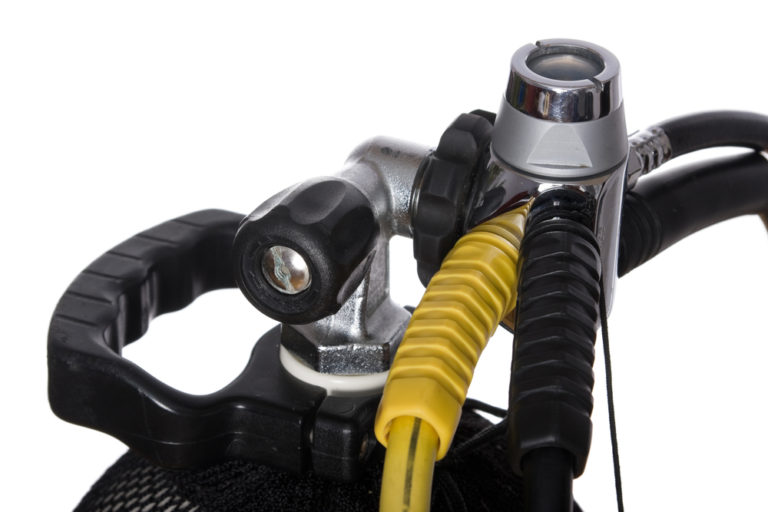
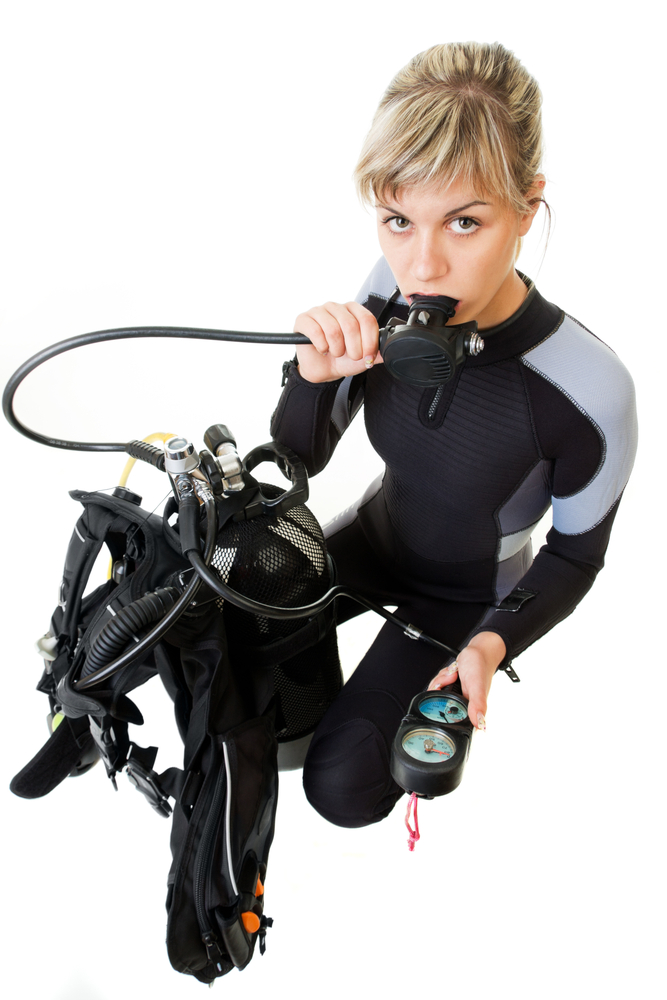
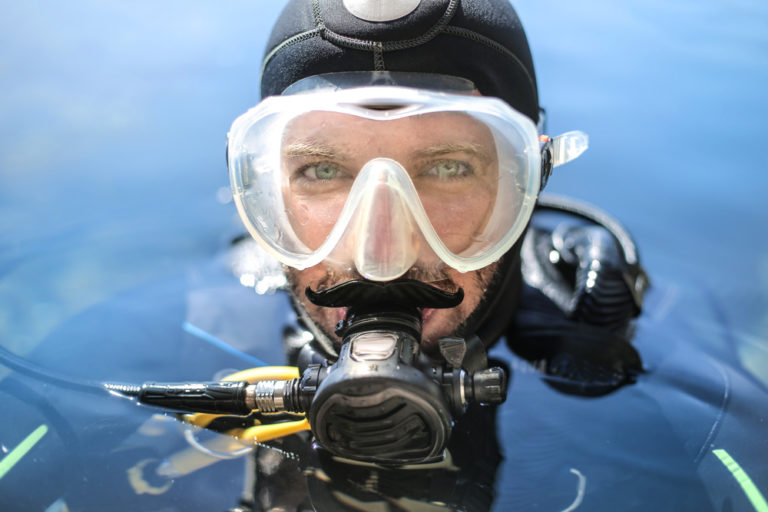
Understanding the scuba octopus setup; how to properly connect it to your bcd and oxygen tank; then actually use the damn thing, is essential to being a scuba diver.
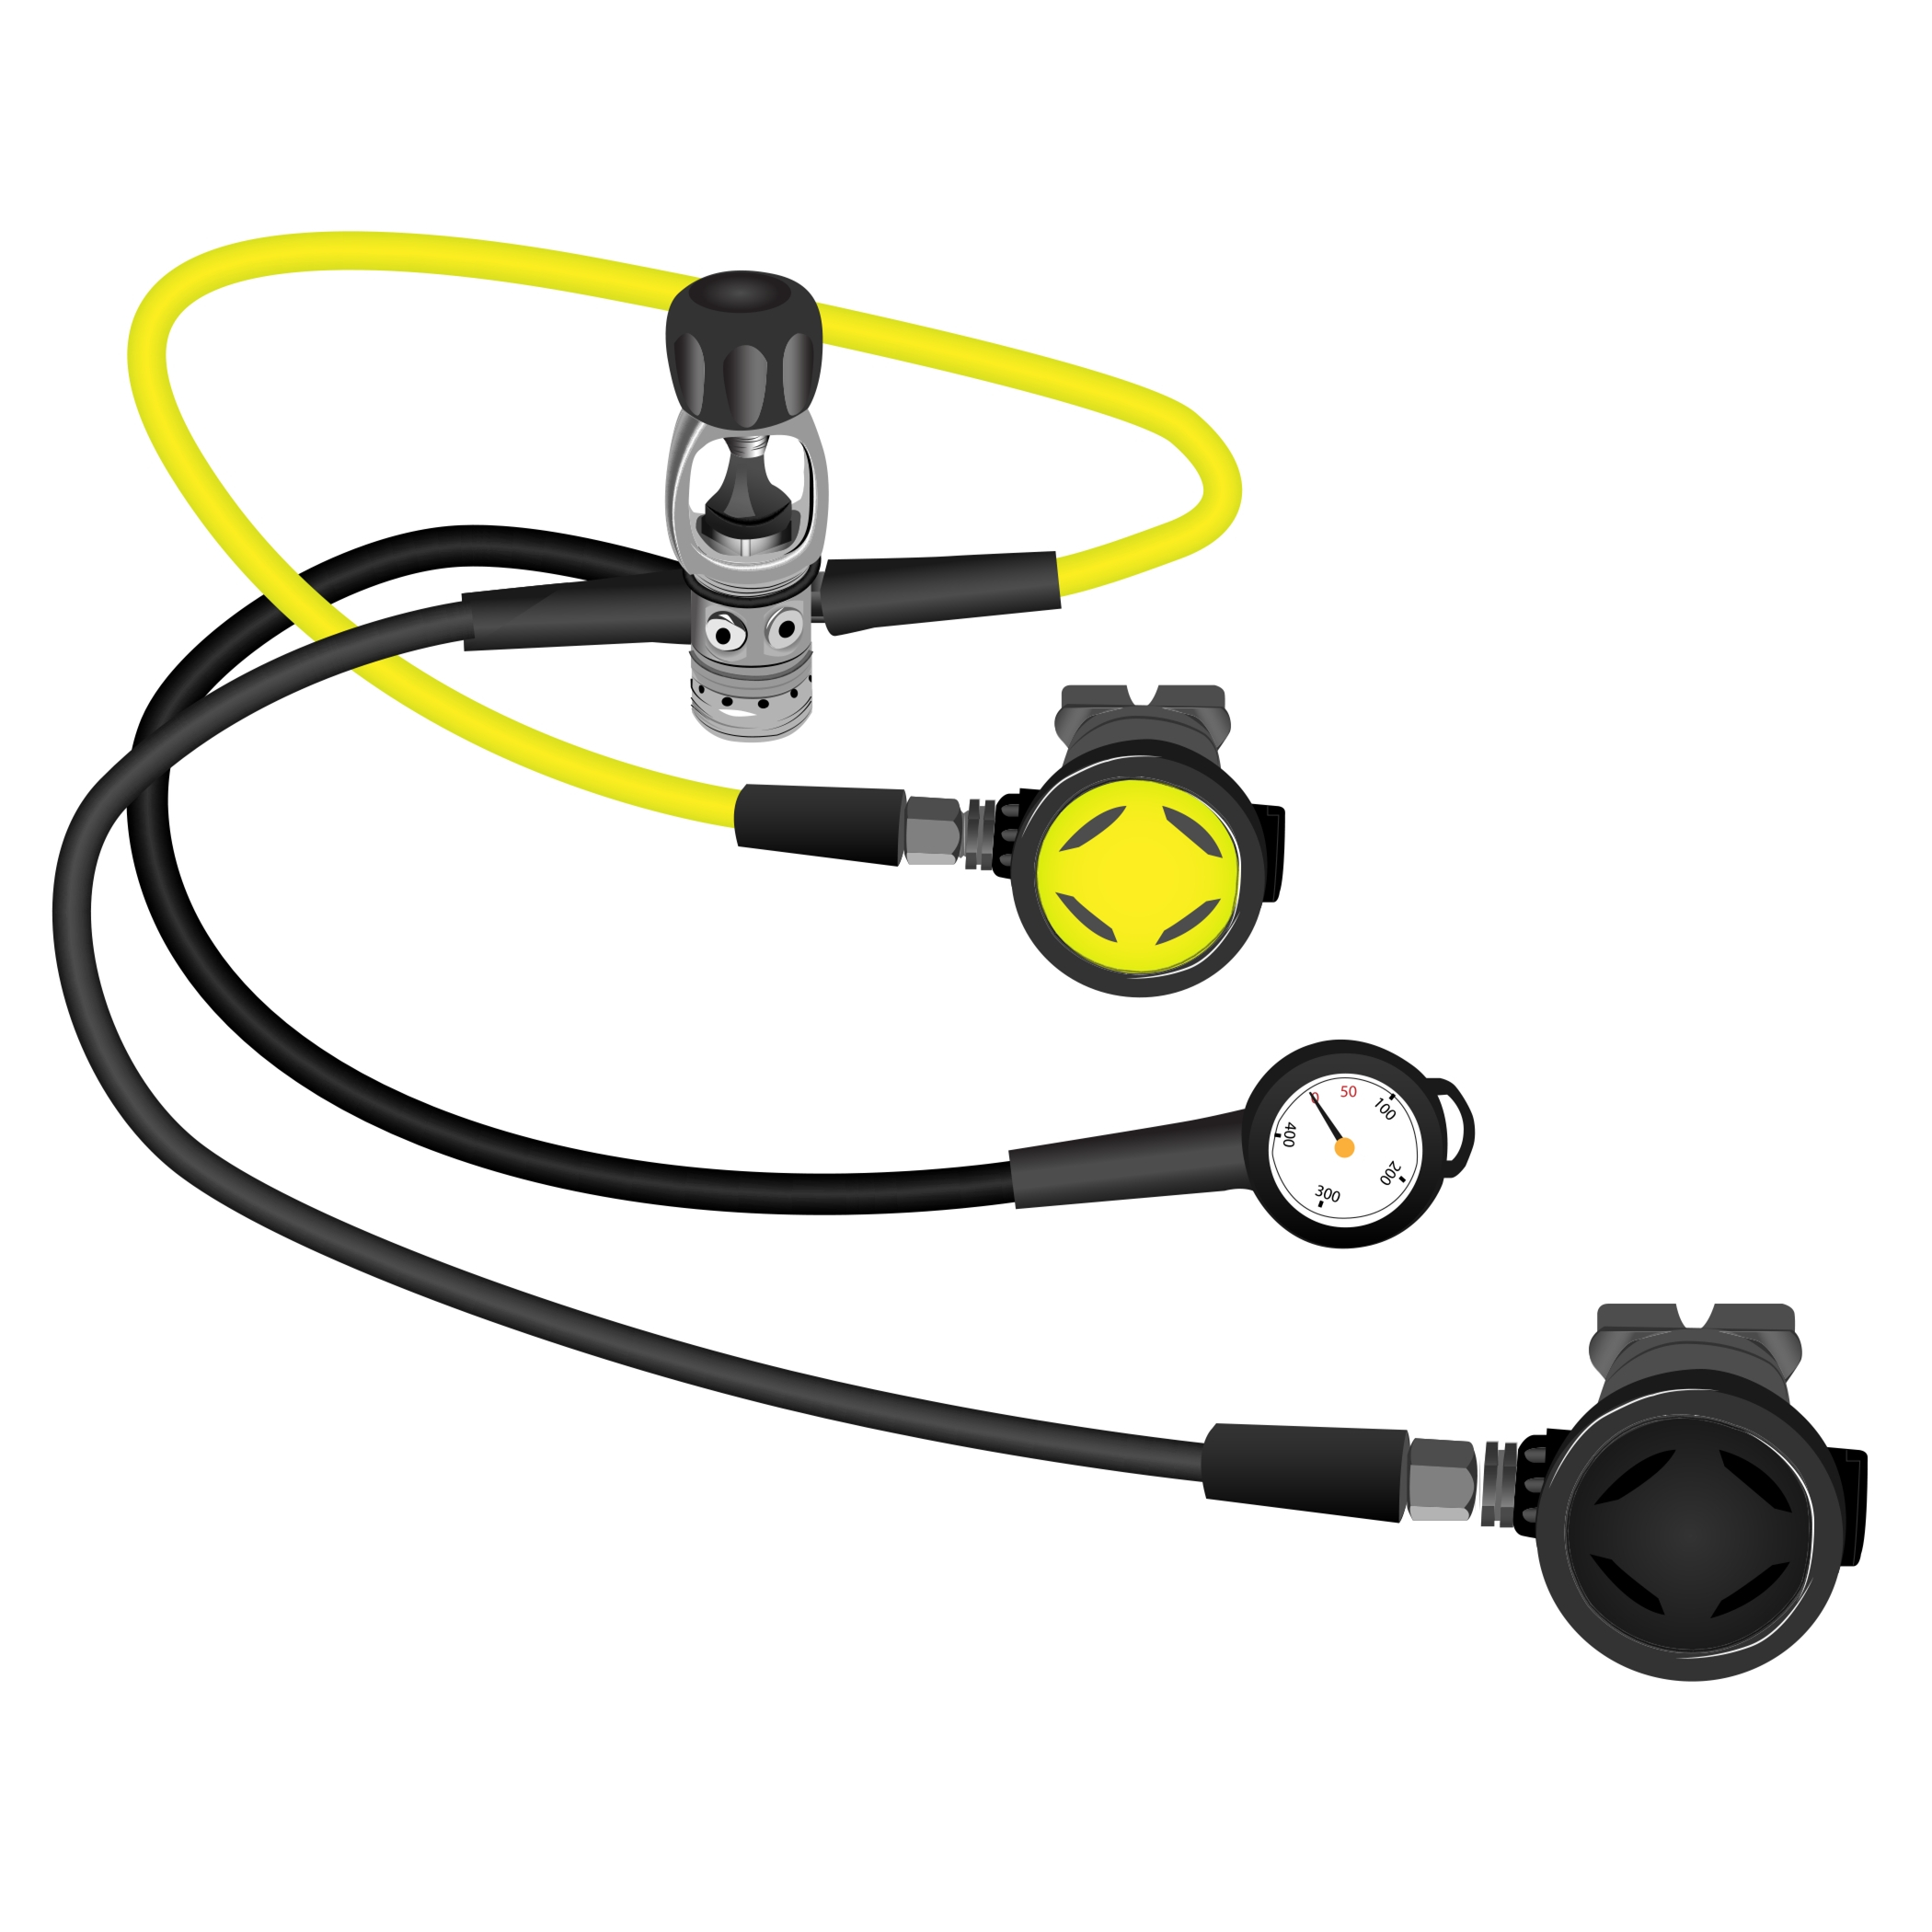
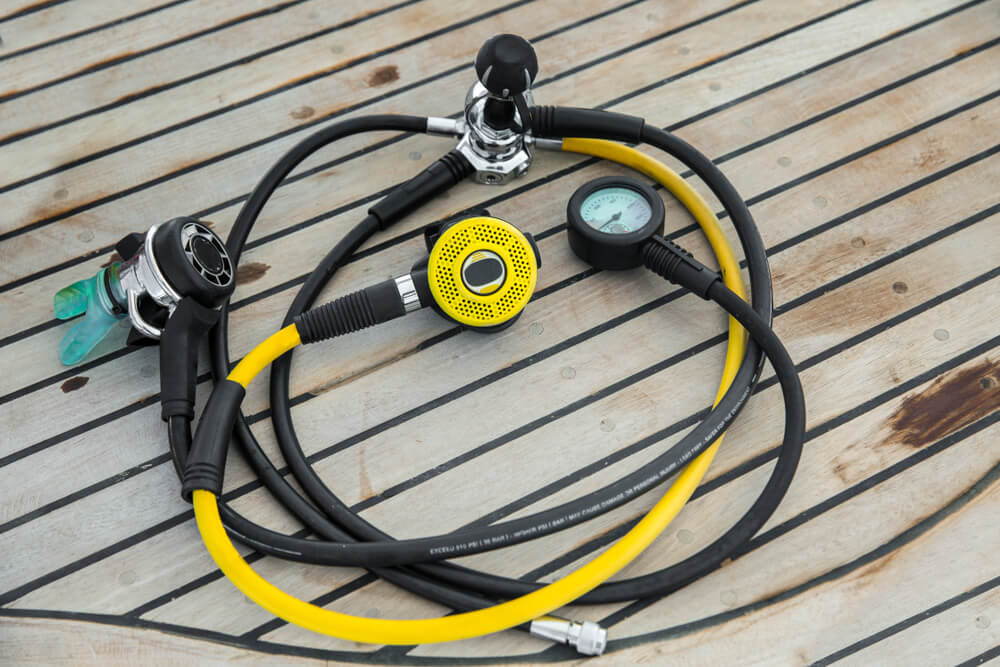
A Scuba Octopus consists of:
- Diving Regulator: Delivers pressurized oxygen to your mouth via the oxygen tank.
- Spare Diving Regulator: For sharing oxygen with a buddy in emergencies.
- Scuba Diving Console: Contains gauges that give readings of your current depth and how much oxygen you have left. Sometimes there’s a compass to!
- Inflator Hose: Attaches to your BCD, allowing you to inflate or deflate it via air transferred from the oxygen tank.
So a scuba octopus is the connected setup of two regulators, a dive gauge and an inflator hose.
However, it’s not uncommon to hear this being described as the scuba regulator setup – even when there’s more to it than just a regulator!
Whatever you want to call it, you need to make sure that your setup is right as it controls whether you’re able to breathe underwater or not – pretty much the defining feature of scuba diving!
CONTENT:
1) Attaching Regulator to Scuba Tank
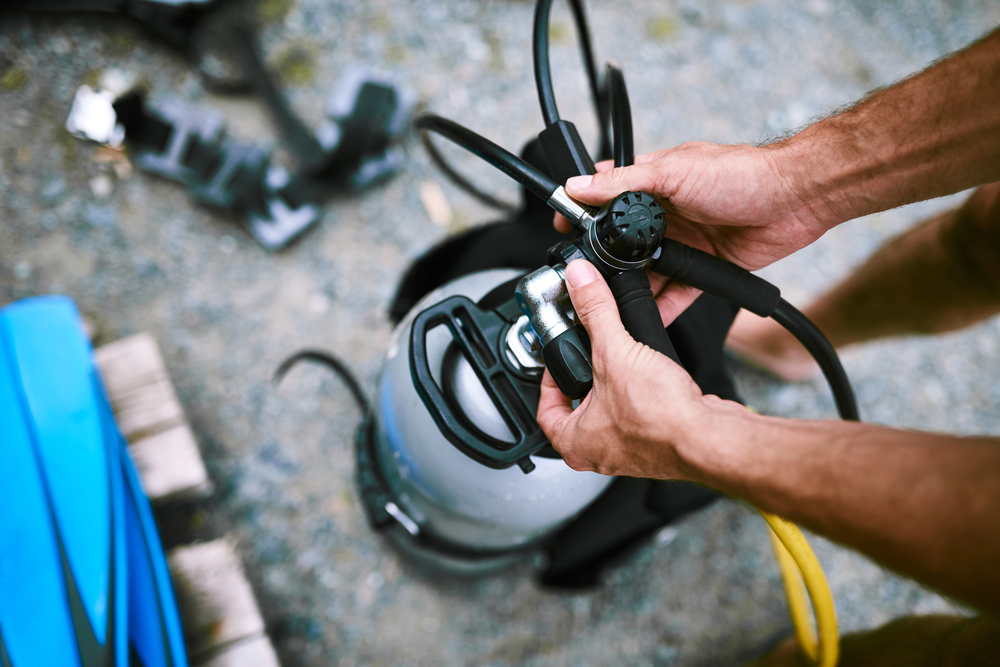
Once you have your scuba octopus ready, you’ll want to safely and securely attach it to your scuba / oxygen tank.
Newbie divers might find this a little tricky, but keep practicing and you’ll be bossing it in no time.
First, the tank needs to be attached to your BCD (Buoyancy Control Device), using the straps at the back of the bcd.
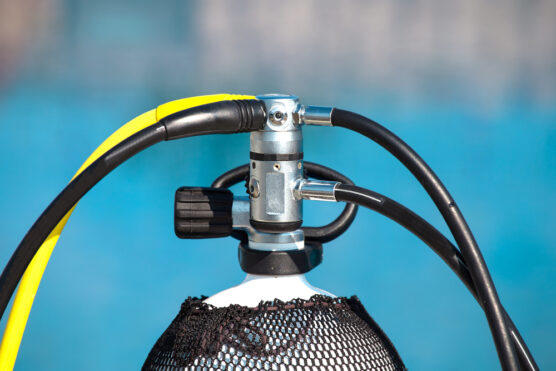
Next, connect the first stage of the scuba regulator to the cylinder valve of the oxygen tank. (You can read more about the first stage in the next section!)
This is achieved with the first stage of the scuba regulator, located at the end of the scuba octopus; where all four parts meet.
To connect the regulator first stage to the oxygen tank:
- Remove tank valve cover.
- Unscrew the metal knob of the regulator first stage and remove the dust cover.
- As you do this, make sure the regulators second stage is on the right hand side of the bcd and the gauge is on the left hand side.
- Attach the inflator hose of the scuba octopus to the intake valve of bcd.
Then it’s just a matter of turning the cylinder valve on the air tank to open it and testing that both your regulators work by taking a couple of deep breaths through them and pressing the purge buttons.
Also remember to press the inflate and deflate button on your bcd, to ensure that the intake valve has been attached correctly.
If you’re uncertain about how to attach your regulator to the tank, be sure to get help from a dive professional. They will make sure that your dive gear and scuba kit is safe for use.
2) Scuba Regulator Setup Diagram
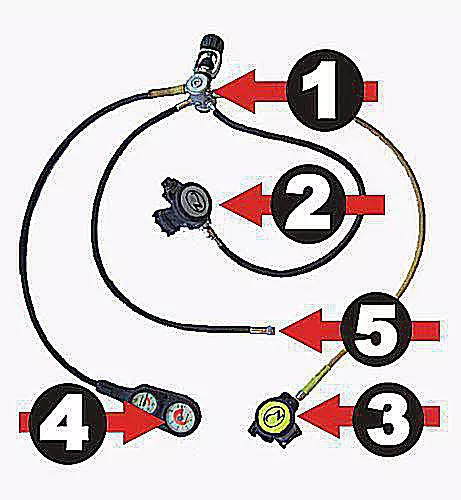
The scuba regulator/octopus setup is generally made up of five basic parts. These parts are all connected together with hoses, and work together to allow you to breathe. Let’s take a closer look:
3) Scuba Regulator Parts
First Stage
All of the mechanisms which lower the air pressure to an intermediate pressure are housed in the first stage body.
This is a metal cylinder through which the air enters, the pressure is reduced, and then leaves to go through the second stage.
This could also be considered the “end of the octopus” as it’s where the 2 regulators, dive gauge and pressure hose all come together.
First Stage Parts:
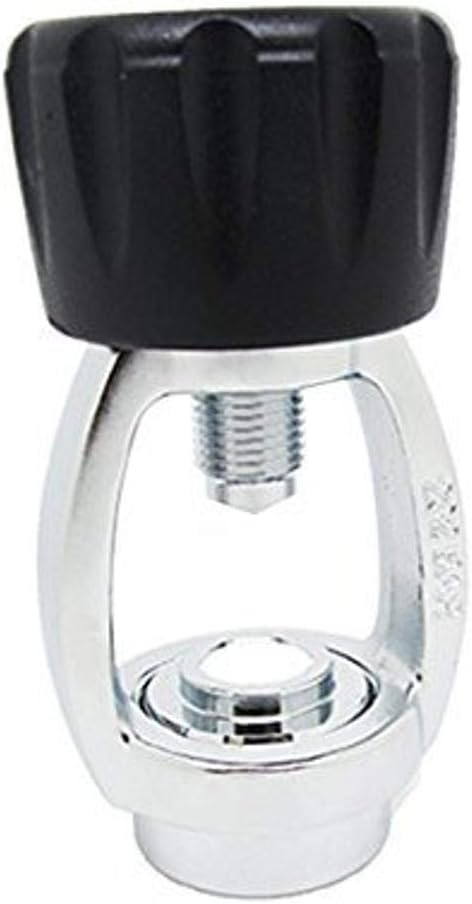
A Yoke or DIN fitting then attaches the first stage body to the scuba tank. This comes with a Yoke Screw which tightens the regulator onto the tank.
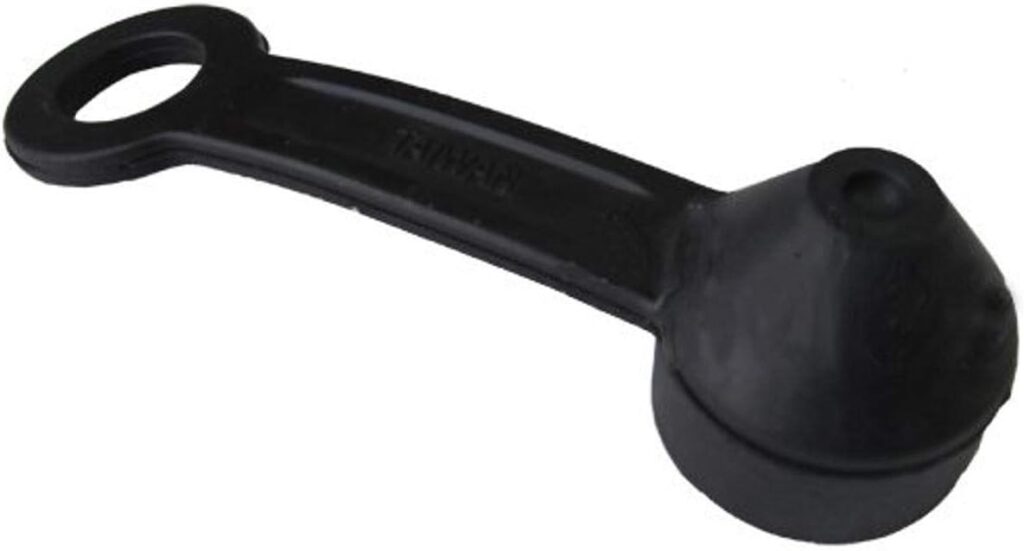
A Dust Cap is a small rubber cap which is positioned over the regulator first stage opening and tightened down using the yoke screw.
This dust cap is crucial for preventing water from entering the regulator first stage body.
Ports and Port Plugs are found all over the first stage body. These are where the different hoses are attached to. If the port is not in use, it will be covered by a port plug.
There are often more ports than what is actually needed, so you can position the hoses in the way they like.
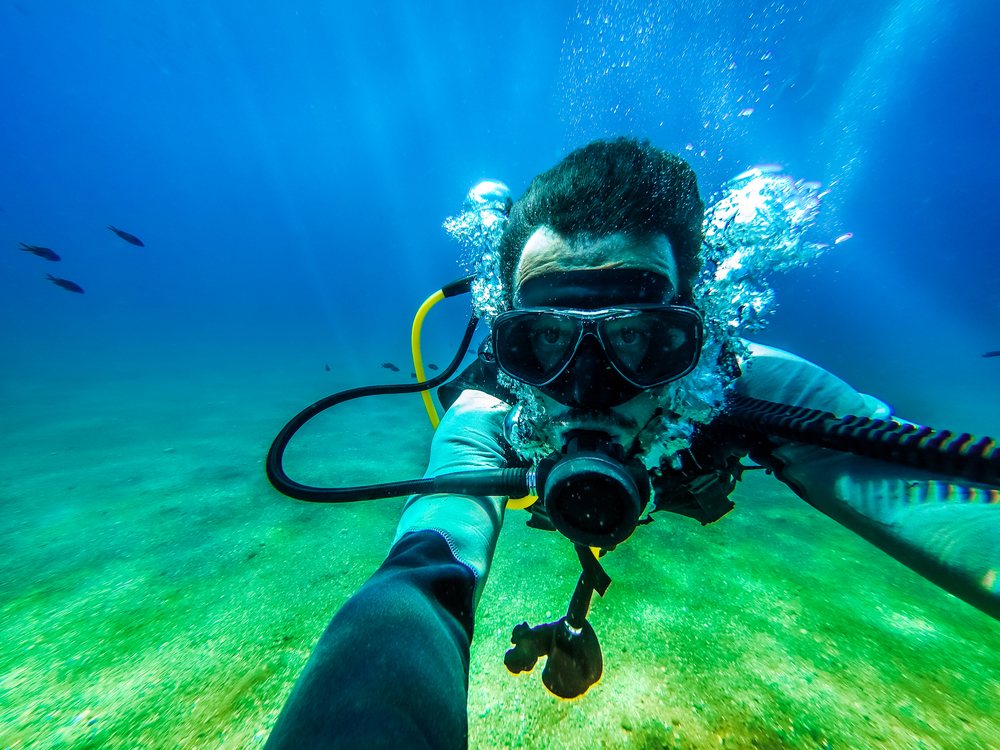
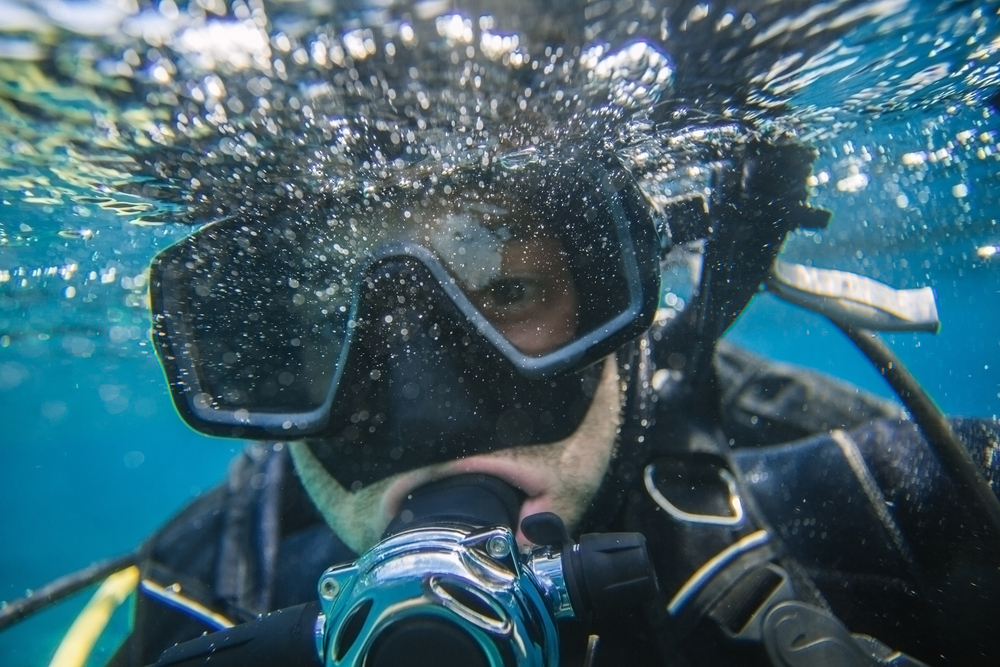
Primary Second Stage
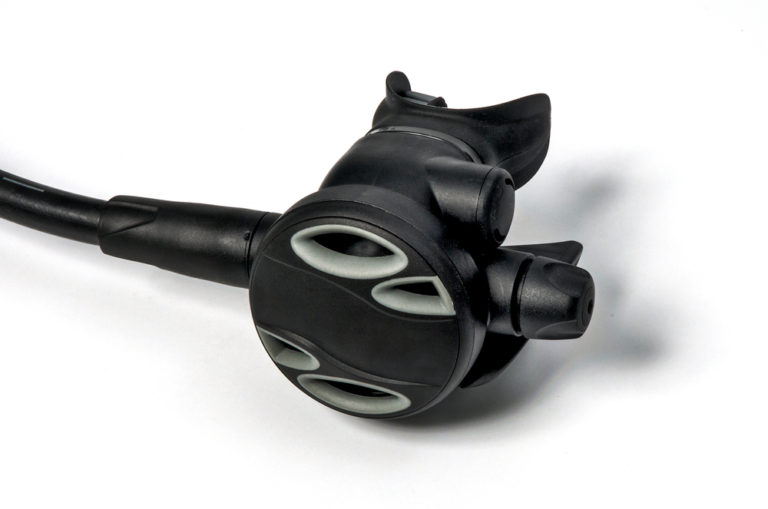
This is the part of the setup which the diver puts in their mouth and breathes from. This part is attached to the first stage by the LP hose.
This part of the regulator works as the second phase of air pressure reduction, and transforms the air into a breathable ambient pressure.
The purge button is found on the face of the regulators second stage. This button allows the second stage to flood with air, forcing any water out of the second stage.
The ease of breathing adjustment is found on most regulators, and it allows divers to adjust their breathing resistance through a knob or lever.
This adjustment helps to avoid free flow, which is when the air flows continuously out of the second stage regardless of the diver’s breath.
An exhaust valve is located on the second stage and works to channel any exhaled air bubbles away from the divers face.
This is found below the mouthpiece and helps you to keep a clear vision. Then there is the mouthpiece. This is the part that the diver puts their mouth on to access air.
Alternate Second Stage
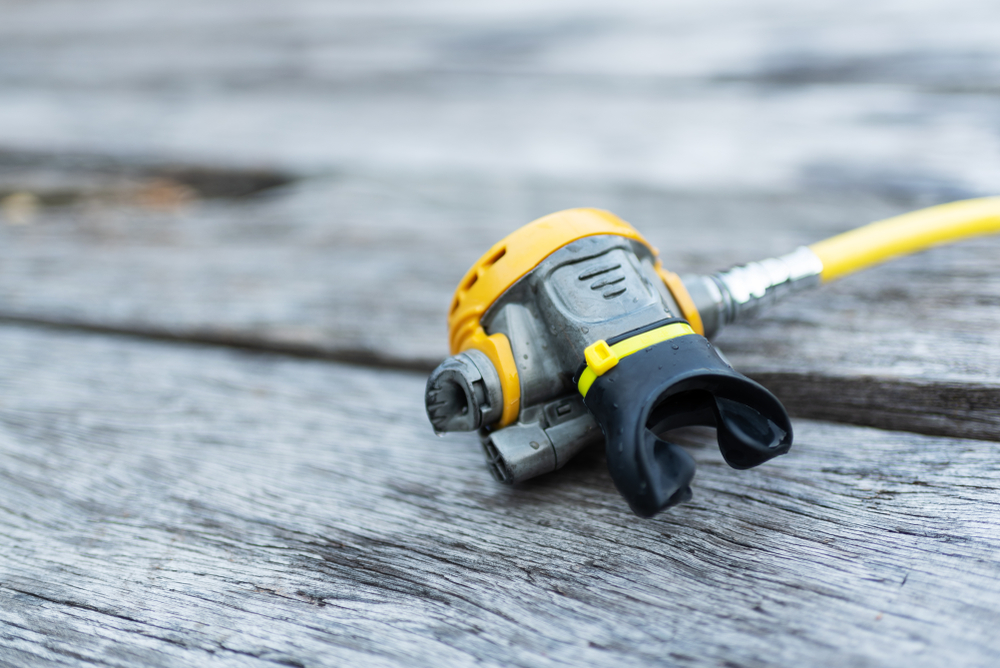
This part of the scuba octopus setup, also called a buddy regulator or an alternate air source, is basically the same thing as the primary second stage.
It does the same job through the same process as the primary second stage, however, it is used as a backup.
In the case of emergency, such as a fellow diver running out of air, the alternate second stage can be used to allow them to share from your air tank. This part is also attached to the first stage with a LP regulator hose.
This part of the scuba octopus setup works exactly the same way as the primary second stage. While it consists of the same parts, it is connected by a low pressure hose.
An LP hose transports the intermediate air from the first to the second stage. An alternate second stage LP hose is usually longer for ease of use by another diver if needed.
Console with Submersible Pressure Gauge
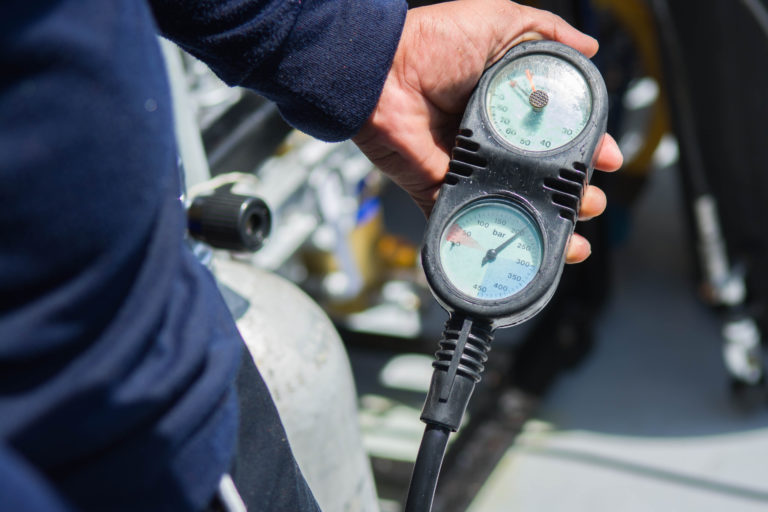
The Submersible Pressure Gauge (SPG) allows the diver to check how much air they have left in their tank to make sure they don’t just run out of air underwater.
A high pressure (HP) hose connects this pressure gauge to the first stage in the regulator. This hose sends HP air directly from the tank to the gauge.
The gauge console also houses other useful gauges, such as a dive computer, depth gauge or compass.
Low Pressure Inflator Hose
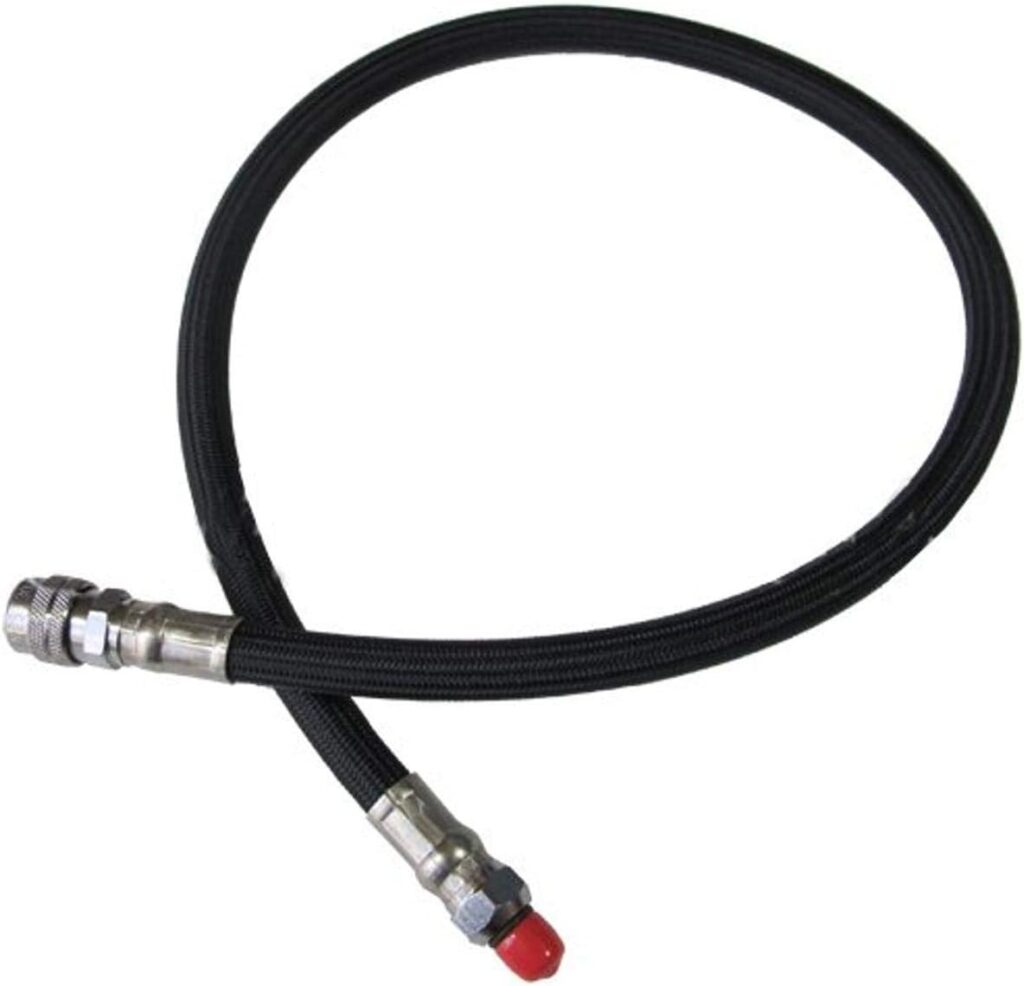
The buoyancy compensator (BC) inflator is fed intermediate pressure air from the regulator first stage through this LP inflator hose. This gives the diver the opportunity to add air to their BC directly from tank when they want to.
Where the low-pressure inflator hose attaches to the buoyancy compensator inflation mechanism, a sleeve is used.
This metallic sleeve needs to be held back when connecting the hose to the BC inflator. They are usually textured for easier grip in the water.
The attachment opening connects the BC inflator to the LP hose. These come in a variety of sizes.
4) Different Types of Scuba Regulator & Buyer’s Guide
When the proud day arrives that you’re finally ready to invest in your own scuba regulator there’s two things you ought to do, to ensure you get the best model for you.
- Inform yourself on the different types of scuba regulators; the variations of features, functions and purposes between them. You can do exactly that by reading this article on the different types of scuba regulators.
- Next, you’ll want to pick the best regulator for your own specific needs such as your level of diving experience, your budget and the kind of diving you plan to do. There’s literally hundreds of scuba regulators out there, but fear not! You can read brutally honest reviews of the hands down best scuba regulators.
5) How Does a Scuba Regulator Work?
Scuba tanks are filled with compressed air at an extremely high pressure.
Trying to breathe directly from this is not possible, and would result in injury.
The scuba octopus setup, or regulator, reduces the pressure of this compressed air to an ambient pressure that the diver can safely breathe.
This is achieved by the air traveling through a series of hoses and valves. The regulator then sends this breathable air to the diver.
The scuba octopus setup works with two main stages: first stage pressure reduction and second stage pressure reduction.
It is important to understand the difference between these two stages, and which valves and hoses work to control them. Keep reading to find out more!
First Stage Pressure Reduction
This initial stage of pressure reduction takes the super high-pressure air or breathing gas from the tank, and lowers it to an intermediate pressure.
This is the first step in creating breathable air, and it is achieved through a few parts.
When looking at a typical open water style regulator, the first stage connects to four different hoses.
One of these channels the high-pressure air directly from the tank and into a submersible pressure gauge.
The other three hoses channel the intermediate pressure air to the second stage, and to the buoyancy compensator (BC) inflator.
Second Stage – Pressure Reduction
In the second stage, the intermediate pressure from the first stage is lowered to an ambient pressure.
The ambient pressure matches the pressure of the water surrounding you, and this is what is safe for the diver to breathe.
This is achieved through the pressurised air traveling through a regulator hose, which then gives the diver access to breathe from.
The second stage can be broken into a primary second stage and an alternate second stage.
These are the same thing really, except that the alternate second stage acts as a kind of emergency air source to those who may have run out of air or in an emergency.
6) Scuba Regulator Maintenance
Scuba octopus setups are complex but reliable mechanisms.
The scuba octopus setup should definitely give you years of good use. In order for this to happen though, you’ll need to keep your regulator well serviced and maintained.
Any local dive center should be able to take your dive gear in for all necessary services. Once a year should be enough for most divers.
Dive shops often refer to this service as a “tuneup”. While this sounds simple, there is actually a lot of work that should be done for it. Your entire scuba octopus setup will need to be disassembled, inspected, replaced where necessary, cleaned up and reassembled.
This often includes replacing and lubricating threads and O-rings, tending to any possible salt damage, and adjusting and replacing valves, connections and hoses. Make sure that your gauges are also checked in your annual service!
If you use a more popular brand, you’ll find that it’s actually far easier to service and find parts for them in remote locations. Therefore, if you plan on traveling a lot with your scuba gear and diving in far off places, having a better-known brand may be wise for servicing reasons.
Scuba diving relies heavily on the equipment. In order to maintain a good level of safety, and avoid any possible emergencies, it’s vital to have your gear regularly serviced, checked and tested by professionals.
If you tend to use your diving equipment seasonally, it’s best to have your scuba octopus setup serviced before you put it away for storage. This prevents any salt damage which could occur while it is not in use.
Diving Squad DEBRIEFING:
And there you have it! Everything you’ll ever need to know about the scuba octopus setup! We’ve covered what this essential piece of gear does, how it works, it’s components and how to look after it. That’s all for now folks.
Support the Squad – Huzzah!
Some of the links in our content are affiliate links. This means that if you buy a product, book a liveaboard, book accommodation or purchase insurance, we earn a small commission at no extra cost to you. Thanks!