Do you ever find yourself unable to recall vital scuba diving skills? Fear not! We’ve got your back:
Click any of the 12 Skills highlighted in Blue to Jump to an Explanation:

Whatever scuba gap in your scuba knowledge has bought you here: fear the scuba not!
We understand how daunting it can be for any scuba diver to dive – or back roll – back into to the world of scuba, after not having been on a dive trip for an extended period of time.
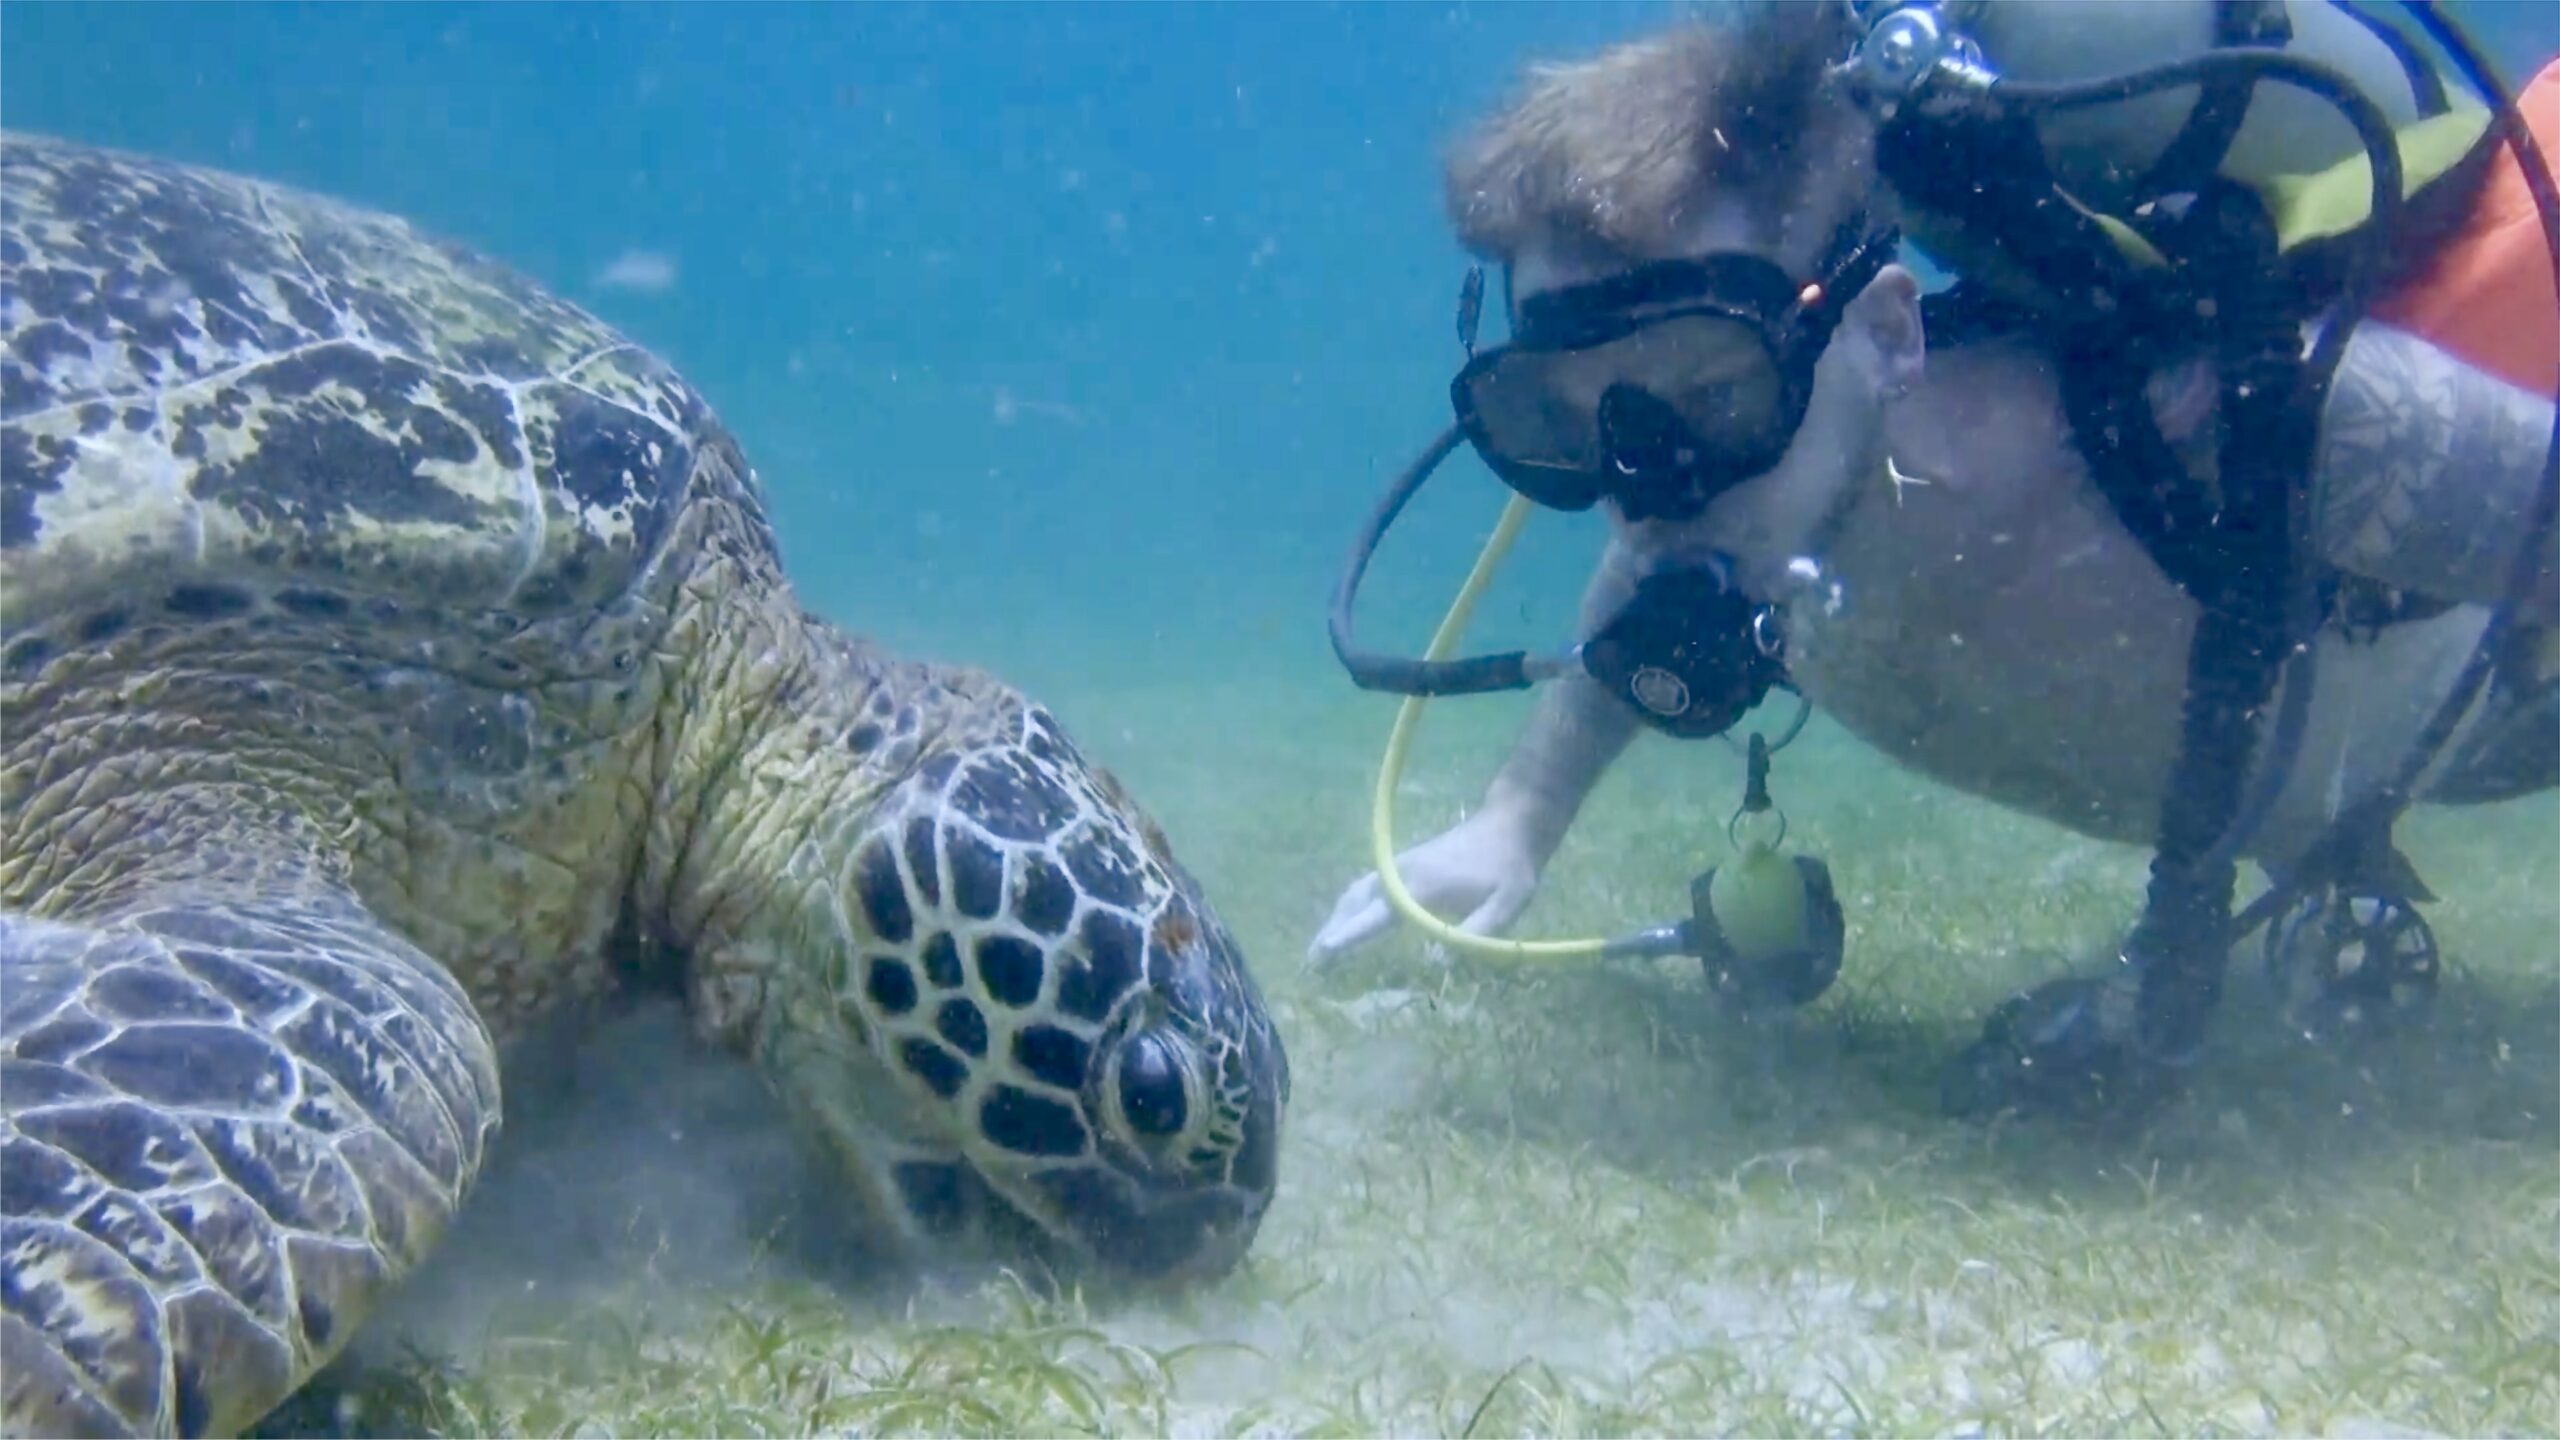
Alex having an in-depth convo with a Turtle about Scuba Refresher Tips!
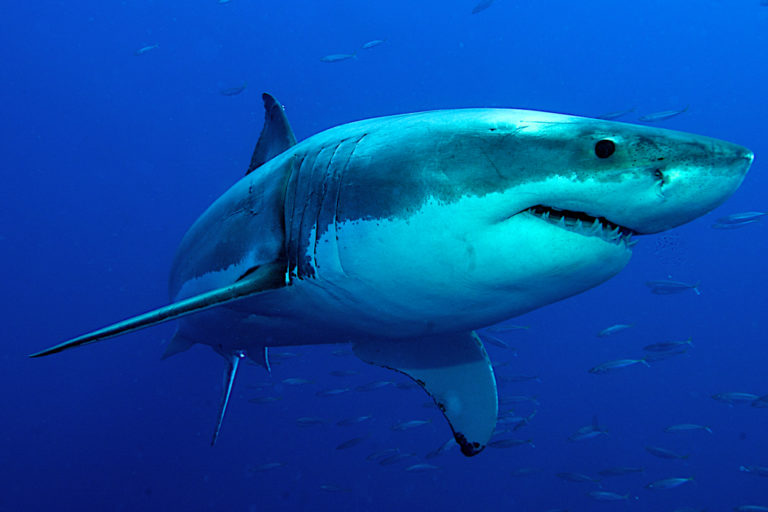
Click any of the scuba skills highlighted in blue above to dive down to an in depth look at them, or blast through this entire whale shark of an article to complete our entire scuba refresher checklist. Let’s do this!
Scuba Refresher Checklist:
1) Dive Buddy Check
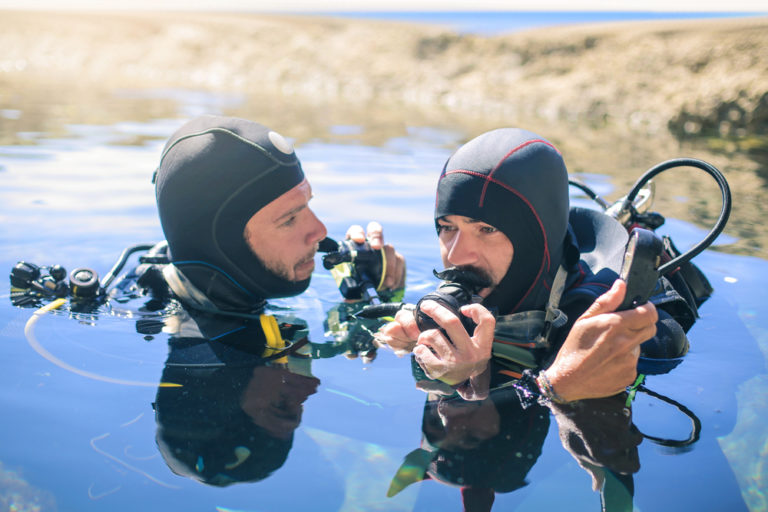
Two dive buddies completing the PADI dive check like a pair of pros
The first of our scuba refresher tips is a breakdown of the 5 step scuba buddy check. It doesn’t condense down into an easy diving acronym, but there’s hope! Diving Squad folks like to think that Big Whales Rarely Attack Fish
Big (BCD/ Buoyancy)
Whales (Weights)
Rarely (Releases)
Attack (Air)
Fish (Final Check)
How to Carry out the 5 Step Scuba Buddy Check:
(Don’t forget you can check out the Dive Gear Checklist section, to remind yourself of scuba gear names, parts and functions).
1. BCD / Buoyancy
(Big)
Check to make sure your dive buddies’ BCD is properly connected to their air supply, and practice inflating the vest for them to ensure adequate airflow.
Also, test deflating the vest to ensure the purge valves are in good working order.
2. Weights
(Whales)
Make sure any additional weights are fastened securely inside the weight pouches.
If your dive buddy is using a weight belt, make sure it’s secured and cinched properly to keep the weight from inadvertently detaching.
3. Releases
(Rarely)
Check to make sure that you and your buddy can easily access and operate all the release catches for your vest, tank, and weights.
This will allow you to easily slip out of your BCD in case of entanglement or an emergency, and assist your partner if need be.
4. Air
(Attack)
Make sure that the air valve is completely open and that all tubes and valves are secured in their respective places.
Take a few deep breaths from your regulator to verify proper airflow and taste. Repeat this process for the spare regulator.
5. Final Check
(Fish)
Strap on all your additional gear and complete a head to toe check to make sure absolutely everything is secured in place and not posing an entanglement risk.
And that’s all there is to it! Buddy checks are an important part of scuba diving safety because it means you get a second pair of eyes checking your scuba gear before you enter the water, to make sure it’s all properly fitted, connected and in working order. This is crucial for a safe dive!

Alex holds the esteemed rank of Grand Admiral of the Diving Squad; a title he most nobly awarded to himself. He is also a PADI Diving Instructor. He’s dived much of Southeast Asia and Western Europe as well as the Red Sea, Central Americas and Maldives. These days, Panglao of the Philippines is where he calls home. Here he works on Diving Squad, certifies fresh Scuba Students and plays Dungeons and Dragons in his house with his homies.
2) Scuba Hand Signs
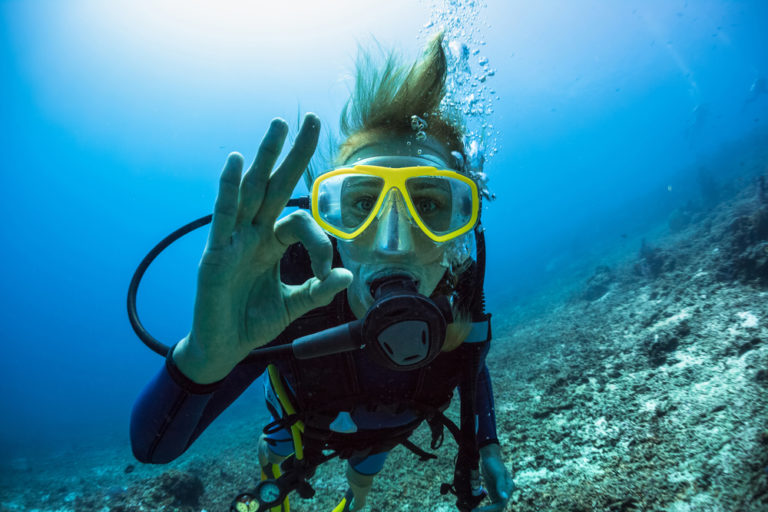
Whether you’ve seen something interesting and want to show others, are cold or you’re running low on air; you must be able to make yourself understood to your buddies when scuba diving! Being able to communicate with your dive buddies is crucial for a safe dive.
How? Through the use of diving hand signals! You would have been taught a few of the scuba hand signs during your open water course, so let’s take a couple of minutes to blast through the main scuba hand signals:
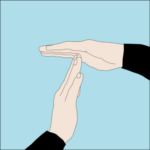
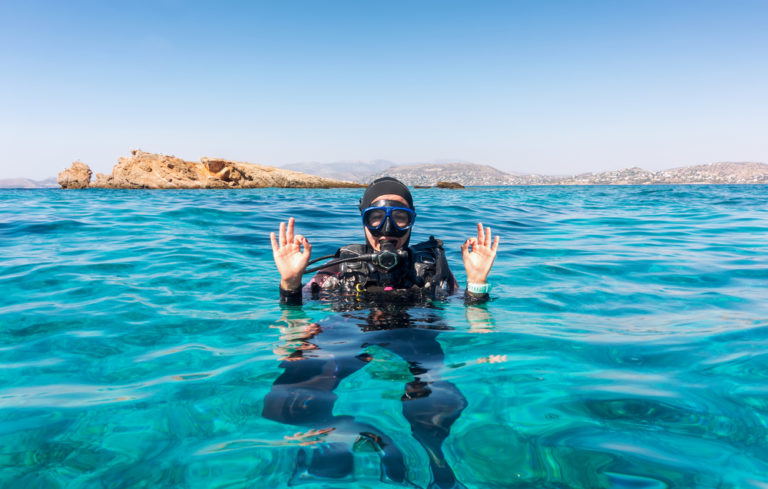
OK (underwater): The most iconic of all the scuba hand signs. Touch your thumb and index finger together to form an O while keeping your other three fingers extended.
OK: (At the surface): Touch the top of your head with your hand, either open or closed and form an O shape with your arm.

Ascend: Thumb up.

Descend: Thumb down.

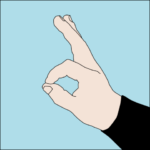
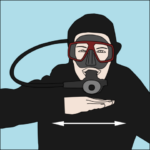
Stop: Extend hand straight out in front of you (like a traffic cop stopping traffic).
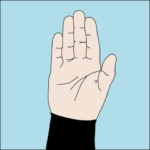
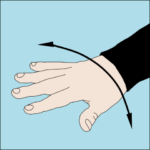
Turn the Dive: Make a circular motion with your index finger.
Problem: Wiggle your hand in front of you. Similar to a so-so sign in standard conversation.
Equalizing Trouble: Point at your ear

Low on Air: Place a clenched fist across your chest
Out of Air: Make a slashing motion across your neck.
I’m cold: Cross arms as in the traditional ‘shivering’ motion.

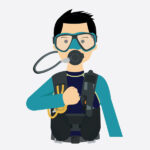
How Much Air Left? – This signal means someone is asking you how much oxygen you have left. (Which you can find out by looking at the pressure gauge!)
100 Bar’s of Oxygen Left – Make a T with your two hands if you have at least 100 oxygen. For every additional 10 bars of air hold up one finger after this signal.
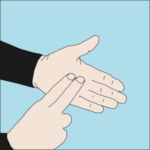
Look at Me – This is when another scuba diver, usually your instructor, wants you to pay attention to them so they can show you something.

All Scuba Photos Credit: Peter Southwood. https://creativecommons.org/licenses/by-sa/3.0/deed.en. No changes made.
Diving Squad TOP TIP for Hand Signals:
As many of us at Diving Squad have learned, the trick to fully utilising these diving signals is making sure you have your buddy’s attention so that they can see what you’re doing!
It’s so easy to leisurely drift along, humming that “under the sea” jam through your respirator, whilst remaining totally oblivious to your squad mate’s frantic attempts to communicate. Trust me.
But there is a crafty way to overcome this. If you can’t get your buddies’ attention, simply use a scuba sound device to do so!
Scuba sound devices consist of a hard object being secured to either your hand or tank; all you have to do with one, is lightly bang it against the tank or shake it, to make a very noticeable sound. This attracts your squad mates attention, allowing you to show them the scuba signal of a lifetime. Check out Scuba Sound Devices.

Check out Diving Squad on Instagram & YouTube
3) How to Equalize your ears
One of the most memorable sensations of scuba diving is feeling the pressure start to build upon your ears as you descend and the satisfaction of knowing how to equalize your ears and bring that pressure back to normal.
If you couldn’t equalize, that build up of pressure would become unbearably painful and you’d be unable to dive down more than a few meters!
Therefore, diving equalizing is an essential topic to include on our scuba refresher checklist!
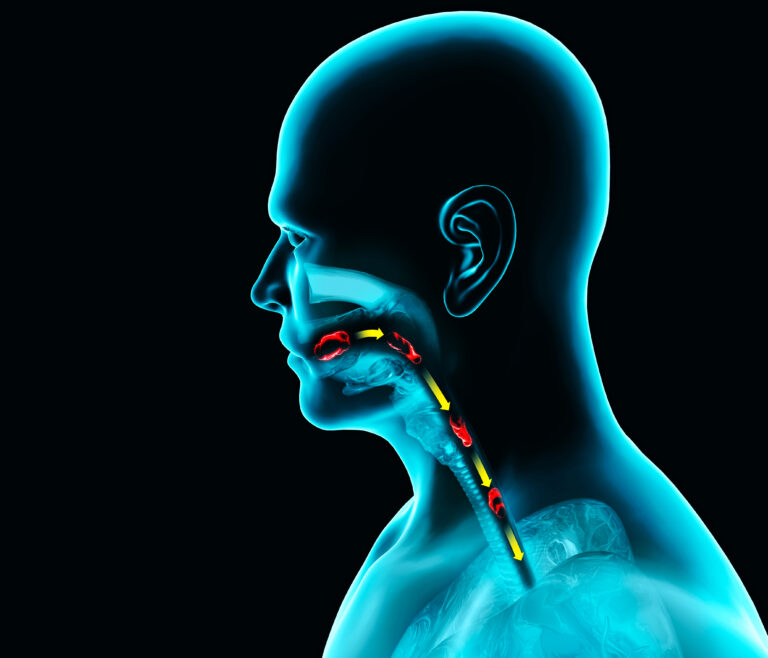
Let’s recall why your ears start to hurt underwater in the first place:
That’s why a pressure difference is created as the pressure in your outer ear increases with depth but the pressure in your middle ear remains unchanged.
You ear canal, or outer ear, is connected directly to the environment, but the space behind your eardrum – known as the middle ear – is not.
It’s all because it creates an uncomfortable feeling that can easily lead to pain and ear damage if the pressure is not equalized.
We are given several tricks to help equalize this pressure as we descend and head off any discomfort before it materialises. So, let’s now review a few of those tricks:
#1 Nose Pinch

This is the most common scuba diving equalizing method and is probably how you were taught to equalize your ears during your open water course. It’s extremely effective!
Simply pinch your nose and try to blow. This will cause a pressure buildup in your mouth and nose that forces open the eustachian tubes that run from the back of your throat to the middle ear, allowing the pressure to equalize.
However, the nose pinch method isn’t infallible and doesn’t utilize the muscles that are already present in that area to open up the eustachian tubes. Take a moment to familiarize yourself with these two additional methods so you have backups!
#2 Swallowing
Swallowing engages the muscles at the back of the throat, opening the eustachian tubes, and can often work to equalize your ear pressure all on its own.
For an added boost, try pinching your nose and swallowing at the same time. The swallowing will open the tubes while pinching your nose will cause a pressure increase and force air into them.
#3 Jaw Movement
Working your jaw also engages the muscles in the back of your throat to allow equalizing your ears.
One of the most effective methods we’ve found is to tense the muscles in the back of your throat while at the same time pushing your jaw forward. Like swallowing, this will open up your eustachian tubes and allow the pressure to equalize.
Diving Squad’s top advice for scuba diving equalizing? Equalize early and often. Begin trying to clear/equalize your ears before you even start putting on your gear and equalize continually while descending.
Most importantly – and one of our most import scuba diving refresher tips – if you start to feel pain or discomfort, don’t try to simply power through it! Ascend slightly, equalize, and then continue your descent.
Equalizing problems didn’t get its own hand signal earlier for nothing! Let your partners know if you need to descend more slowly or take an equalization break!
4) Diving Breathing Excercises
Have you ever noticed how more experienced scuba divers posses that uncanny ability to control their air consumption and make their supply last much longer than yours? This inevitably leads to you being the one to turn the dives every time, which can be a little awkward..
Your fellow divers look THIS impressed.
That’s why next up on our scuba refresher checklist are a few diving breathing exercises; to put you on the fast lane to improved air efficiency! Let’s dive in:
Diving Breathing Exercises Explained:
First of all, when it comes to trying to conserve your air – never hold your breath! Doing so can lead to a lung over-expansion injury, which could prove fatal. Instead, make sure you always breathe, but dammit – breathe properly!
The key to breathing properly is improving your diaphragm muscle. This muscle stretches across the lower portion of your rib cage and separates your heart and lungs from the abdomen; it is absolutely pivotal to proper air exchange in the lungs.
Most of us are guilty of lazy breathing by only using our chest muscles to expand and contract our chest cavity and thus breath.
However, deploying your diaphragm will allow you to draw air deeper into your lungs, improve oxygen exchange and ultimately improve your air consumption. To achieve this, we need to strengthen the diaphragm and actually start using it effectively when breathing:

Diving Breathing Exercise #1:
Lay down on your back with your legs bent. Place one hand on your chest, and the other on your abdomen, allowing you to feel all your muscles engaging while breathing. Now, practice breathing deeply and slowly from your nose, while focusing on engaging your diaphragm as much as possible.
You should feel your stomach rising and falling, while your chest should barely be moving. This takes practice, but keep at it and you will start to feel a difference.
This guy feels it…
Diving Breathing Exercise #2:
Another one of the best Diving Breathing Exercises to improve air consumption is to simply work on your breathing rate:
You’ll notice in the previous exercise that we stressed breathing deeply and slowly. This will require some practice!
Focus on inhaling very slowly, while staying very calm and not elevating your heart rate. When it’s time to exhale, don’t simply breathe out all at once, but rather focus on very slowly exhaling a little at a time. And don’t forget, to never hold your breath!
LEVEL UP: Exhale!
Here’s an exercise that rarely gets taught but is frequently used by tech divers, professional scuba divers and divers with a competitive streak: exhaling.
If you’ve ever tried to hold your breath in the swimming pool / bath / going through a tunnel on the motorway, you probably noticed that moments before you had to breathe again, there was an uncomfortable sensation in your chest.
Contrary to popular belief, this sensation – the urge to gasp for air, is not actually caused by a lack of oxygen but by a build up of carbon dioxide in the bloodstream.
Exhaling lowers carbon dioxide levels in the body, which is why aquatic mammals such as otters exhale as they dive down, to minimise the amount of carbon dioxide in their bloodstream in order to stay under for as long as possible.
You can do the same! Next time you dive, exhale as much as you possibly can just before you descend. Then, throughout the rest of the dive continue to do so on each out-breath. Don’t worry about your inhalation. That will take care of itself.

Just focus on exhaling more than you normally would. By exhaling for longer, you’ll increase the length of time between breaths and this will save a lot of air! You don’t have to wait till your next dive to practice exhaling more. Try now!
I learnt this golden nugget of wisdom from a scuba diving legend; Gary Kulishek, back when I was training to become a dive master in Puerto Galera, Philippines!
I was amazed and surprised to find that as soon as I employed this technique, I started finishing dives with 30+ more bar of air more than I normally would! Gary goes into a lot more detail on exhaling during dives in this interview. Yes, that’s us in the picture below!

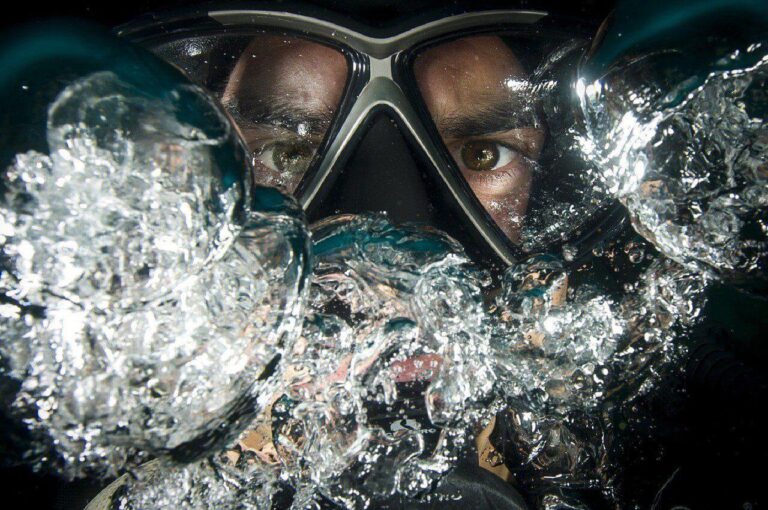
5) Mask Clearing
From time to time, water leaks into a mask during a dive, which can be pretty annoying. Luckily, it’s easy to clear a scuba mask underwater, allowing you to behold the aquatic world once more! There’s just three simple and easy steps:
- Look up slightly.
- Press on the top of the mask seal / skirt – some divers use the palm of one hand to press against the seal whilst others use a two handed approach, with one or two fingers of each hand. I prefer using two fingers from each hand!
- Exhale – As you exhale, continue pressing on the top seal/skirt of the mask to ensure it stays closed. This means that as you exhale through the nose, any water gets forced down and out of the mask by the air exhaled from your nose.
It’s as simple as that! Don’t forget to continue looking up throughout this scuba skill! It’s definitely worth mentioning: that whilst all scuba masks have the potential to leak at some point or other, this likelihood can be greatly reduced by finding a scuba mask that fits your face type well.
There are many different makes of scuba mask out there; some dive masks are tailored especially for small faces whereas others are for large faces. Some diving masks are specifically made for female facial structures whereas others are for male. You can even get scuba masks that have been made to create a particularly good fit for someone with facial hair.
To find out more about scuba mask designs, features, types and Diving Squad’s favourite models of dive mask, check out our Best Scuba Masks Article.
6) Scuba Weight Calculator
Of all the scuba diving refresher tips, the scuba weight calculator can seem the most complicated; so it requires the most explanation.
Ok: remember your early diving days, when your instructor eyed you up and down and then magically handed you a weight belt with the correct amount of weights on it to make you neutrally buoyant on dives?
Your instructor was sizing you up, estimating your weight and calculating how many additional scuba weights you’d need to remain neutrally buoyant (which means you don’t float up or sink down).
Their ability to guesstimate weights and actually be right comes from years of experience in the water.
However, even without years of experience, theres a tried and tested method for the Scuba Weight Calculator:

“Much to Learn about the Scuba Weight Calculator, you have”.
What’s involved in the Scuba Weight Calculator:
- There are several components that affect your overall buoyancy; these include your tank, BCD, wetsuit, and – of course – you!
- The most accurate scuba buoyancy calculator method is to iteratively determine the weight needed to make your entire setup neutrally buoyant.
- This means you will hang motionless in the water with half a breath, ascend when breathing in and descend when breathing out.
To Find this Weight:
- Start with your body in just a swimming suit. Wade into the water and determine the weight needed for neutral buoyancy.
- After you’ve this number, put on your wetsuit and repeat the process. The increase in weight needed from swimsuit to wetsuit indicates the buoyancy weight of your wetsuit.
- Now, as we continue along the scuba buoyancy calculator list, you should submerge your BCD, purge ALL the air and determine if it is inherently neutrally buoyant or if it needs some additional weight of its own.
- Finally, take a close look at the specs for your air tank; as the weights when full or partially empty can vary greatly across brand and material types.
Summary:
In essence, you must determine if your tank will be positively or negatively buoyant, and compensate with additional weight.
Given a choice, we recommend getting a steel tank as they tend to remain negatively buoyant whether full or empty. Add all these weights together and you have the ideal additional weight you need to wear for optimal buoyancy!
Remember, the goal is to slowly sink with an empty BCD and full tank at the beginning of your dive (at the surface). At the end, when you’ve lost some weight from using the compressed air, you should be perfectly neutrally buoyant.
“Wait, what”!?

We realise that this Scuba Weight Calculator process is a bit of a handful!
As well as this, you will undoubtedly tweak your weights as you continue diving.
If you don’t have the time to iteratively determine your required weight…fear not!
There is a ballpark estimate you can use to get close, and then adjust from there.
How to Estimate the Scuba Weight Calculator:
Simply carry 10% of your body weight in additional weights. This number will certainly not work for everyone, but it is at least a starting point.
How to Estimate the Scuba Weight Calculator:
Regardless of which Scuba Buoyancy Calculator method you’re using, you’ll need to complete a buoyancy test once you have your weight picked out.
Don’t worry, it’s very easy! Simply strap on all your gear as if you’re embarking on your dive, deflate your BCD completely, and get into the water. At the surface, you should be slightly negatively buoyant and sink slowly even when inhaling.
Plunging into the depths like a boulder is not the goal! You want to begin your descent nice and slowly; remember that as you go deeper and your gear is compressed, you’ll pick up some speed!
7) How to Achieve Neutral Buoyancy with even less effort:

Although the scuba weights calculator is an essential first step in achieving neutral buoyancy, as you dive more, you discover that there’s a little more to mastering buoyancy than just having the right amounts of weights on a belt.
You see, most beginner divers are overweighted! Being over-weighted makes achieving neutral buoyancy more difficult, because every extra pound of led has to be balanced with a pound of extra buoyancy.
Ultimately, this leads to fiddling with the bcd controls more throughout the dive as well as being over reliant on bc adjustment as a form of movement, i.e. to get close to things or ascend away from them.
But with more experience, you may eventually even stop using a weight belt altogether! When I trained to become a dive master in the Philippines, I went from always having several pounds on my weight belt – to just a couple – to none at all! To this day, I still don’t dive with any weights.
Another advantage of diving with less weights is that you don’t have to inflate your bcd so much, which reduces drag underwater and allows you to move about more freely, whilst exerting less effort and therefore saving air.
Of course, some people are naturally more floaty whereas others tend to be more “sinky” (like me!) which means you might always need a weight belt.
However, chances are that with improved technique you can use less weights on your belt and by doing so achieve better neutral buoyancy by not being overweighted.
Many scuba diving instructors admit to over-weighting students for the same reason your dad put training wheels on your bike – to make things way easier for someone only just learning to get the hang of things (they dont’ want you get an air embolism!).
The thing is, after training you through your open and advanced open water course, an instructor usually moves straight onto the next student and doesn’t stick with you long enough to explain to you the need to remove some weights from your belt, now you’ve got the hang of things.
But like training wheels, those extra weights have to come off as your experience level progresses! Go on, give it a go – take two pounds off before your next dive.
If you find it hard to sink below the surface, remember to keep your body still and roll back slightly to let the bubble of air that often gets trapped between the back of your head and the bcd, to escape. Also, exhale fully!
Remember, buoyancy changes fastest in the first few feet below the surface – three times as fast at one foot as at sixty feet. So, even if it feels hard to get submerged – once your down five or six feet, you seem to get heavier and sink a lot easier!
Be sure to have less air in your bcd as well to counter having less weights! Once you get the hang of this, you’ll quickly notice how much more easy it is to achieve and maintain neutral buoyancy throughout a dive; all whilst saving more air!
To Master Neutral Buoyancy Underwater, pay attention to your:
Trim:
This is the position your body takes in the water when it is neutral or still. It’s important for buoyancy because if your fins are lower than your body, kicking to go forward will also make you go up. It’ll feel like you’ve suddenly become buoyant, so you’ll vent air from your bcd.
Then, when you stop kicking, you’ll be too heavy and you sink. For this reason, it’s important for your body to be trimmed so that it is virtually horizontal and your fins push you only forward.
Here’s how to check your trim:
- Once you are neutral hold your body still, with your legs stretched out behind you. If your legs sink, then move your weight from your waist to a higher point of your body.
Breath Control:
Your lungs are a natural buoyancy compensator – they have about 10 pounds of buoyant lift! A normal, resting breath expands your lungs by roughly one point, give you one pound more buoyancy. Breathing in and out, your buoyancy fluctuates within a range of about one pound.
But you can place that one pound fluctuation almost anywhere in the total 10 pound range. For example, you can breath from nearly full lungs and cycle between eight and nine pounds of buoyancy, or you can breath with nearly empty lungs and cycle two and three pounds.
So long as you’re nearly neutral with a half breath, you can rise or fall at will just by controlling your lungs – which is a hell of a lot better than doing so by inflating and deflating your bcd!
Frog Kicks:
Most beginner divers are taught to kick their legs in the same way anyone does when doing front crawl in the swimming pool; by criss crossing their legs up and down like a pair of scissors.
The disadvantage of these kinds of fin kicks, is that they’re not symmetrical and so each kick throws the body to the side a little and can only be compensated for by kicking the other leg. It’s very ineffective for making small, singular movements or for hovering still, straight afterwards.
A much more effective method is to frog kick, which is exactly what it sounds like; a symmetrical outward movement and then curling in of both legs, like a frog. Also, reverse frog kicks allow you to go backwards without using your arms or turning your body! Plus, they require less energy and therefore save more air.
Putting it All Together:
Once you’e got your weight belt and trim dialled in, you’ll have come a long way towards perfecting your neutral buoyancy!
Now you can fine-tune your bcd inflation to compensate for the very predicable changes due to breathing down your tank and changing depth, whilst exclusively using breath control to drop gently down to that pygmy seahorse, hover inches above it as long as you want and then lift away from it harmlessly, smoothly and awesomely.
8) Scuba Acronym for Descent
Just four more scuba skills left on our Scuba Refresher Checklist! Great work. This one’s nice and easy:
Our obsession with scuba abbreviations leads us to yet another Scuba Acronym. Its long-winded name is the PADI 5-point scuba descent acronym, but all you need to remember is SORTED.
Signal
Signal your fellow squad member(s) that you’re ready to descend.
Orientate
Take a look at your surroundings and get your bearings in relation to the shore, boat, or any other landmarks in the area. Ideally, glance at your compass at the same time to help cement your area awareness.
Regulator
Unless you’re in the mood to swallow some seawater, put your regulator in your mouth and take a couple of breaths.
Time
Take note of the time that you’re beginning your dive. Most dive computers do this anyway, but it is still beneficial for you to think about turnaround times and your total bottom time.
Equalize
Be sure to equalize the pressure in your ears even before you start descending. Also remember the point that we discussed earlier: equalize early and often during your descent!
Descend
Now you’re ready to begin descending, slowly deflate your BCD and let the adventure begin. And there you have the last item on our scuba descent acronym!
This particular scuba acronym is thankfully short and very easy to remember. Simply run it through your mind a few times, put it to good practice in the field and you’ll always be…SORTED!
Now that you have the scuba diving acronym for descent cemented amongst your other scuba diving refresher tips, we’ve almost covered all of the essential elements of our entire scuba refresher checklist!
You’re just about ready to jump back in the saddle – or BCD, in this instance – and get back into the water! But there is one more item our squad members want to cover beforehand. Hint – what do you need to Scuba Dive?
9) Dive Safety Stop
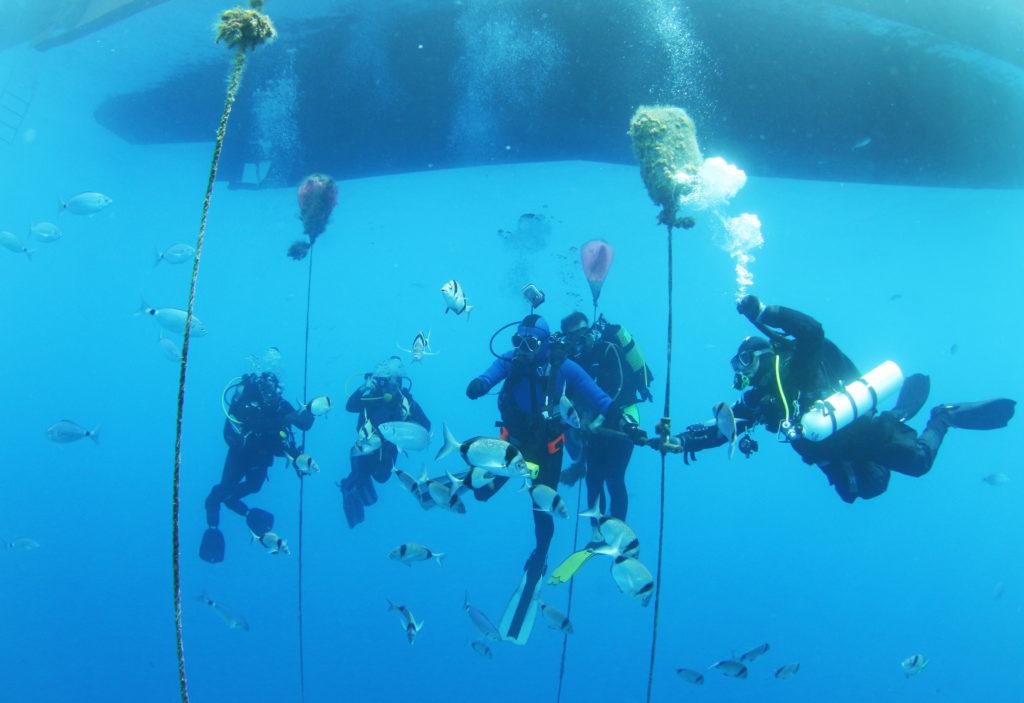
A dive safety stop is a 3 to 5 minute stop made at 15 to 20 feet (5 – 6 m) during the final ascent of the dive. The purpose of a safety stop is to maximise dive safety:
- First, a safety stop allows more time for absorbed nitrogen to be released from a divers body. This further lowers the chance of decompression sickness.
- Secondly, a safety stop allows a diver to fine-tune their buoyancy before ascending through the final 15 or so feet of water. By fine-tuning their buoyancy before ascending to the surface, a diver makes a more controlled and smooth ascent at a safer pace.
- During a dive stop, the dive guide will let up a surface marker buoy; which is a fluorescent orange, inflatable rod that marks the position where everyone will surface, to ensure boat traffic sees and avoids this area.
When is a Safety Stop Required?
- All recreational scuba diving organisations consider safety stops to be mandatory after every dive. So don’t be surprised when at the end of each dive, your guide instructs you to make the safety stop. It’s a vital final step in a smooth and safe dive.
10) Dive Gear Checklist
It’s essential that you fully understand every last piece of scuba gear; after all it’s what you’ll need to dive! That’s why we’ve put together this handy Dive Gear Checklist. In addition to operating the gear properly, this will allow you to complete the Scuba Buddy Check that PADI recommends for all divers.
The following pieces of gear are essential items for you to review and include on your dive equipment checklist. Make sure your familiar with them all before your next dive trip!
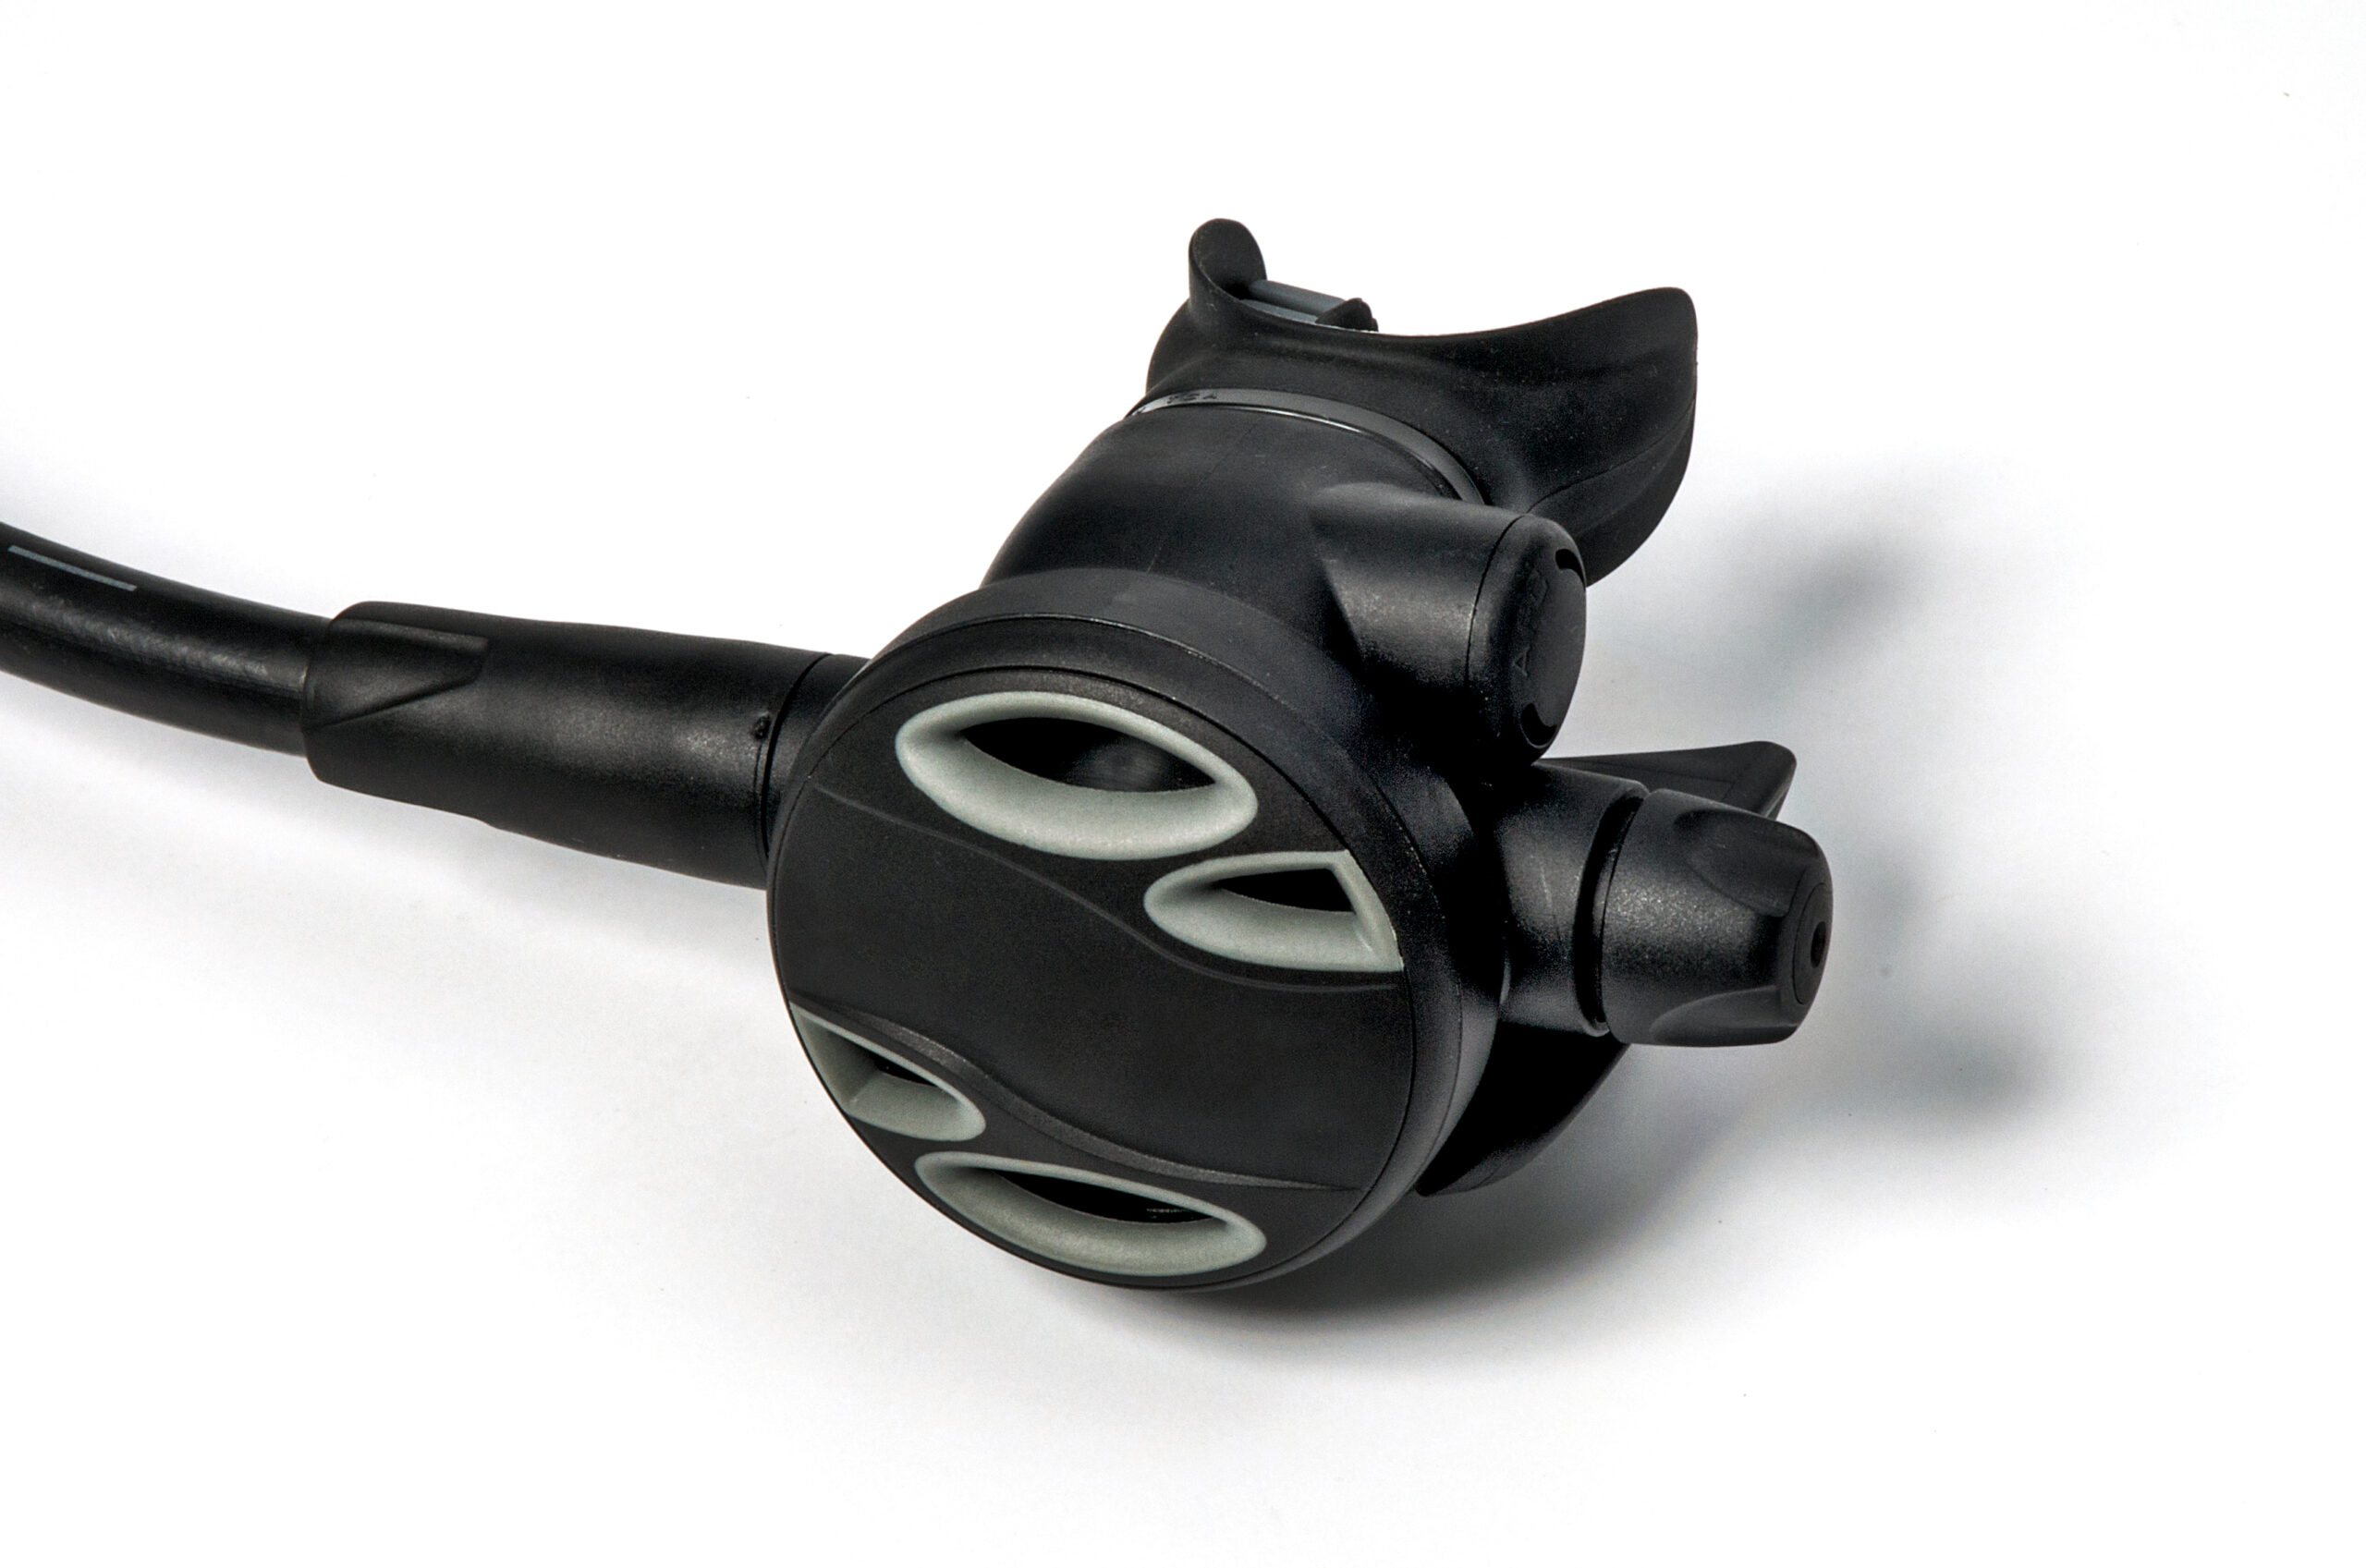
Regulator – Reduces pressurised breathing oxygen to ambient pressure and delivers it to the diver through a mouth piece.
Divers take two – one for themselves and a spare for a buddy in case of emergencies!
Two regulators, a dive gauge and a bc attachment hose together form the Scuba Octopus.
Read about the Scuba Octopus Setup.
Scuba Tank – This contains the pressurised breathing gas – i.e. oxygen, that you’ll be breathing underwater, after it’s been reduced to ambient pressure by the regulator.
Scuba Weight Belt – Assists with neutral buoyancy, by stopping divers from floating to the top of the water.
How much weight you take will depend on your build, weight and diving ability.
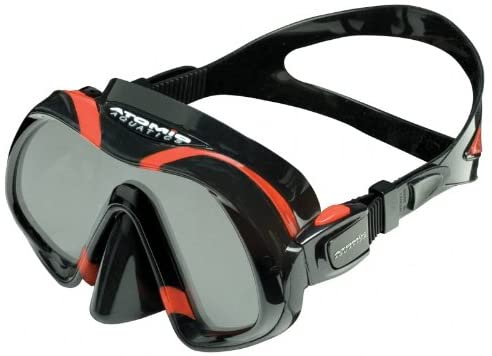
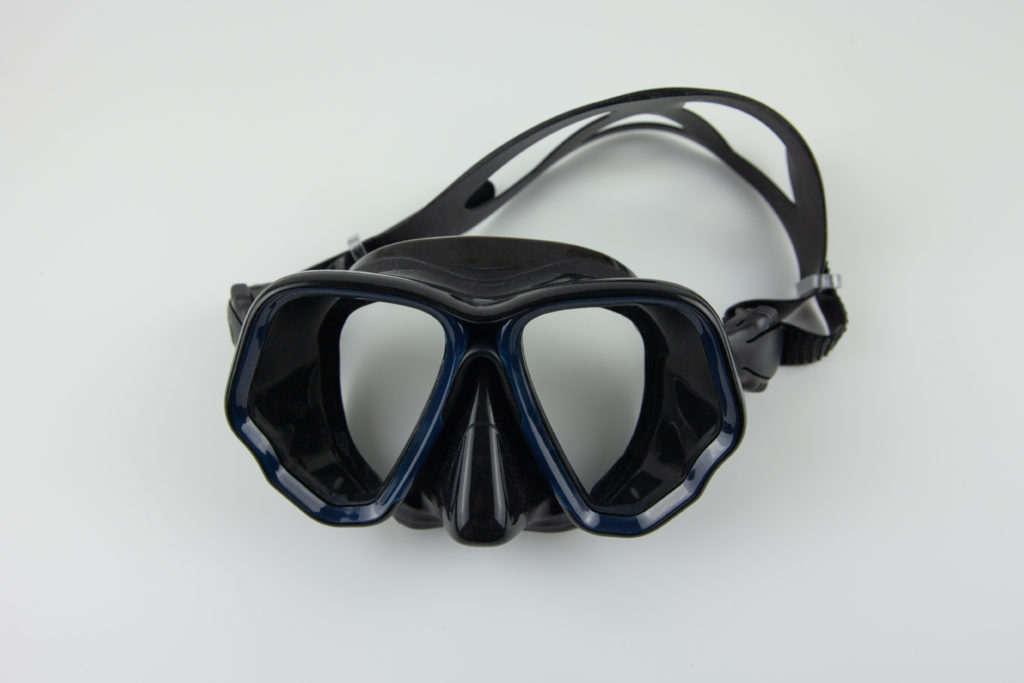
Diving Mask – Scuba diving masks keep water out of your eyes allowing you to marvel at the aquatic world in crystal clarity. Different types of mask suit different face shapes.
Read about Scuba Mask Designs.
Scuba Fins – Fins greatly reduce water resistance when swimming and thus help to conserve energy and swim faster / against currents.
BCD – The jacket divers wear to maintain optimum buoyancy, which they can adjust by operating the inflate and deflate buttons.
This makes sure they neither sink to the bottom nor rise to the top of the water!
As well as this, the BCD keeps in place the divers regulator(s), dive gauge and air tank.
Read about Types of BCD.
Dive Computer – Dive computers are used to measure the time and depth of a dive.
In doing so, it calculates a safe ascent profile, vital for avoiding decompression sickness.
Read How to Use a Dive Computer
Pressure Gauge – Essential for keeping track of your air consumption and the depth at which you are diving.
A high quality pressure gauge will often also feature a compass and can read the water temperature.
Wetsuit – Crucial for keeping you warm. Even in hot countries, when you dive deep, it gets cold. Which one you pick will depend upon the climate where you’re diving.
Dive Boots – Designed to be worn under your fins, dive boots prevent rubbing and skin irritation from said fins – whilst also keeping your feet toasty and warm.
11) Trying Underwater Photography
Nowadays, you don’t need no fancy photography degree or hundreds to thousands of dollars worth of equipment, to capture decent underwater photos and videos of your scuba adventures.
In today’s technical revolution world, it’s easy to purchase a great value underwater camera with image stabilisation, special modes and a waterproof case for less than a hundred dollars!
Combine this with a little knowledge of the basics of underwater photography and you can be out there in the big blue capturing awesome underwater footage in no time.
- Check out our Underwater Photography Tips for a beginners’ look at capturing photos and videos of scuba diving.
- Or take a look at our Camera Reviews, where we go through a range of the very best underwater cameras – or see the Cheap Dive Cameras page to check out the cheapest underwater cameras available.

12) NEXT UP: PADI Refresher Course
If you haven’t been scuba diving in a while, one of the best possible ways to get back into the swing of things is to take the PADI Refresher Course also known as the PADI ReActivate Programme.
This scuba refresher course covers in-water scuba skills as well as a little scuba theory. Every PADI diving school offers this refresher training – once you tell them your specific needs, they will then customise it especially for you.
If it’s been a long while since your last dive trip, most diving schools will require you to undergo the PADI Refresher Course before you go on a fun dive, but fear not: It can usually be completed in just half a day, comprising some scuba theory, possibly a pool session and also a practice dive!
After that, you’ll be good to join the rest of your squad mates on the rest of the day’s diving.
Honestly, in my earlier days as a scuba diver I went a few annoyingly long periods without diving and found the scuba refresher course, the best possible way of restoring my scuba knowledge.
By combining PADI’s ReActivate Course with the repeated use of this article beforehand (keep coming back to test yourself!), you will be unstoppable as you rapidly re-ascend through the ranks of scuba divers ;). You can find out more about the padi refresher course here.
Diving Squad DEBRIEFING:
And there you have it Diving Squad! We’ve fully covered our scuba refresher checklist from top to bottom and reintroduced all the points you should review when dipping a toe back into the big blue.
From your scuba weights calculator to your scuba buddy check, all your pre-diving bases are now covered and then double checked with the standard dive check PADI recommends.
Once in the water, we covered your scuba acronym for descent, diving equalization during the descent, and a few of the best breathing exercises for diving as well as how to master neutral buoyancy and how to clear your scuba diving mask.
Of course, we also reminded you of the most important scuba hand signals for communicating with your fellow dive buddies as well as the safety stop and a complete scuba gear checklist!
Now all you need is the perfect location to rinse off those diving skills with a refreshing plunge into some crystal-clear tropical waters! Best of luck on your next scuba mission! Diving Squad Out.
Support the Squad – Huzzah!
Some of the links in our content are affiliate links. This means that if you buy a product, book a liveaboard, book accommodation or purchase insurance, we earn a small commission at no extra cost to you. Thanks!